Looking for the ultimate Yosemite day hike? Half Dome is one for your hiking bucket list and is easily one of the most famous in Yosemite National Park. It is not for beginners; you’ll need good fitness and technical ability. However, if you are an experienced hiker, setting your eyes on reaching the top of Half Dome is a worthy challenge.
Ready to hike up to Half Dome? This guide will tell you everything you need to know about the Half Dome hike. From what to expect along the way to a breakdown of the best times for hiking Half Dome, we’ve got you covered.
Table of Contents
What is Half Dome?
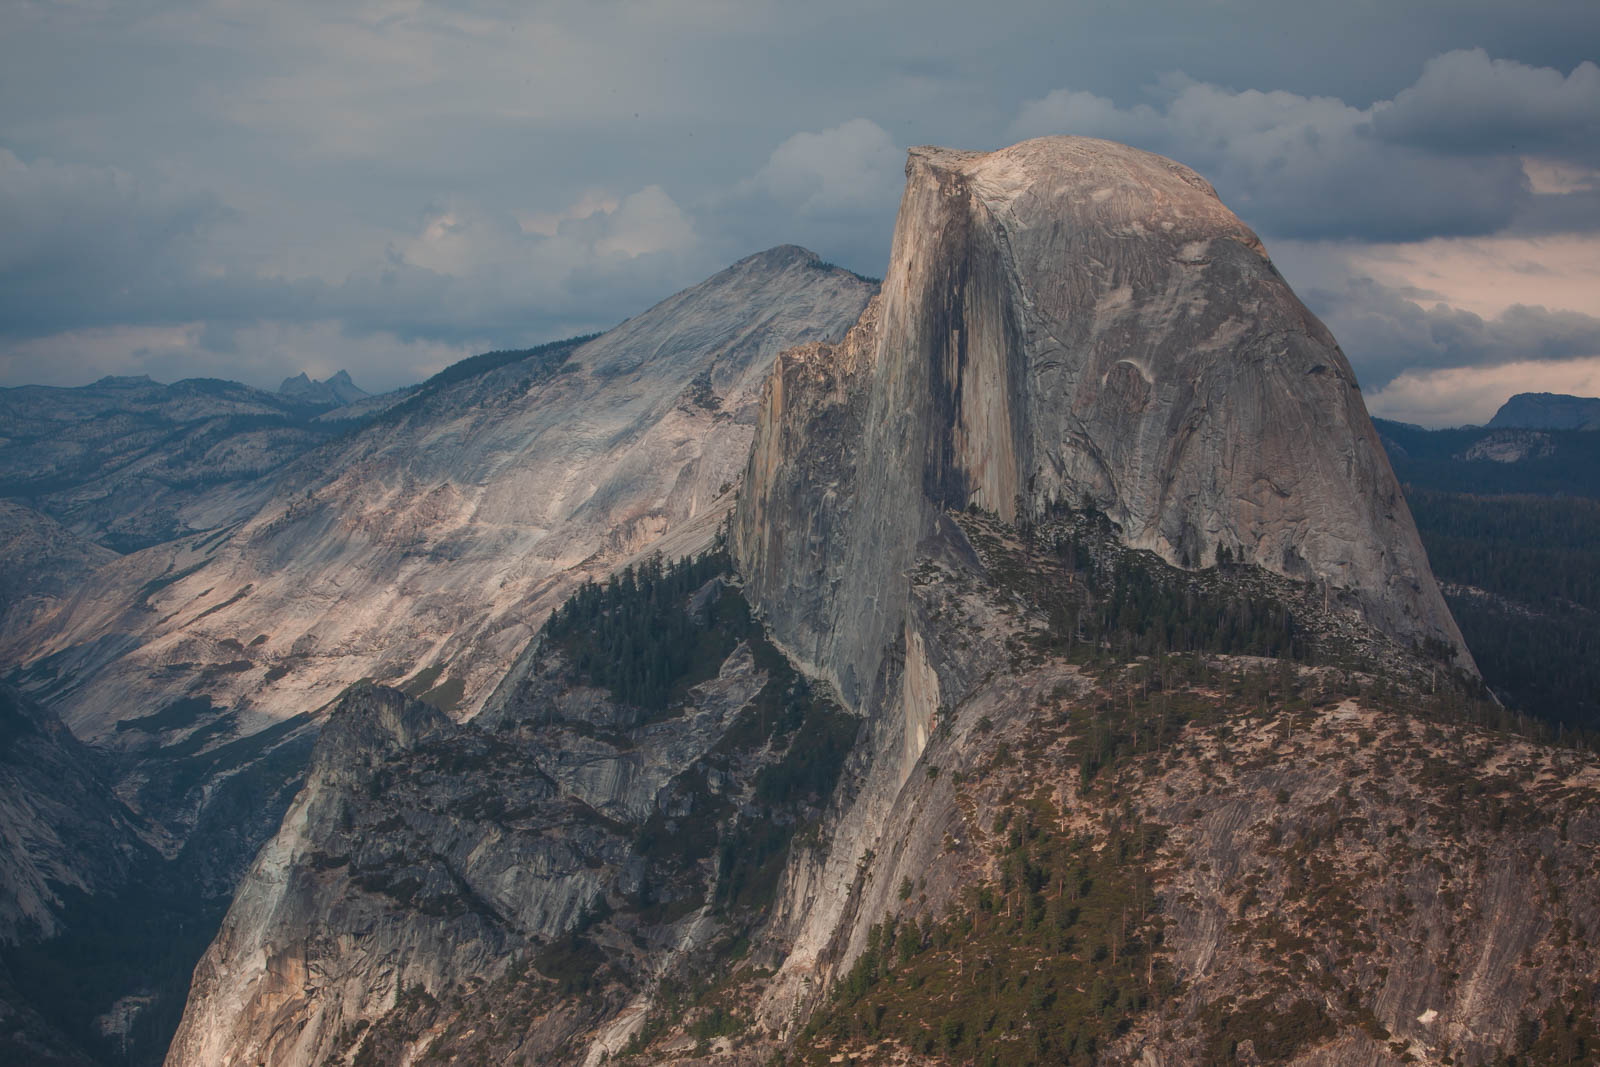
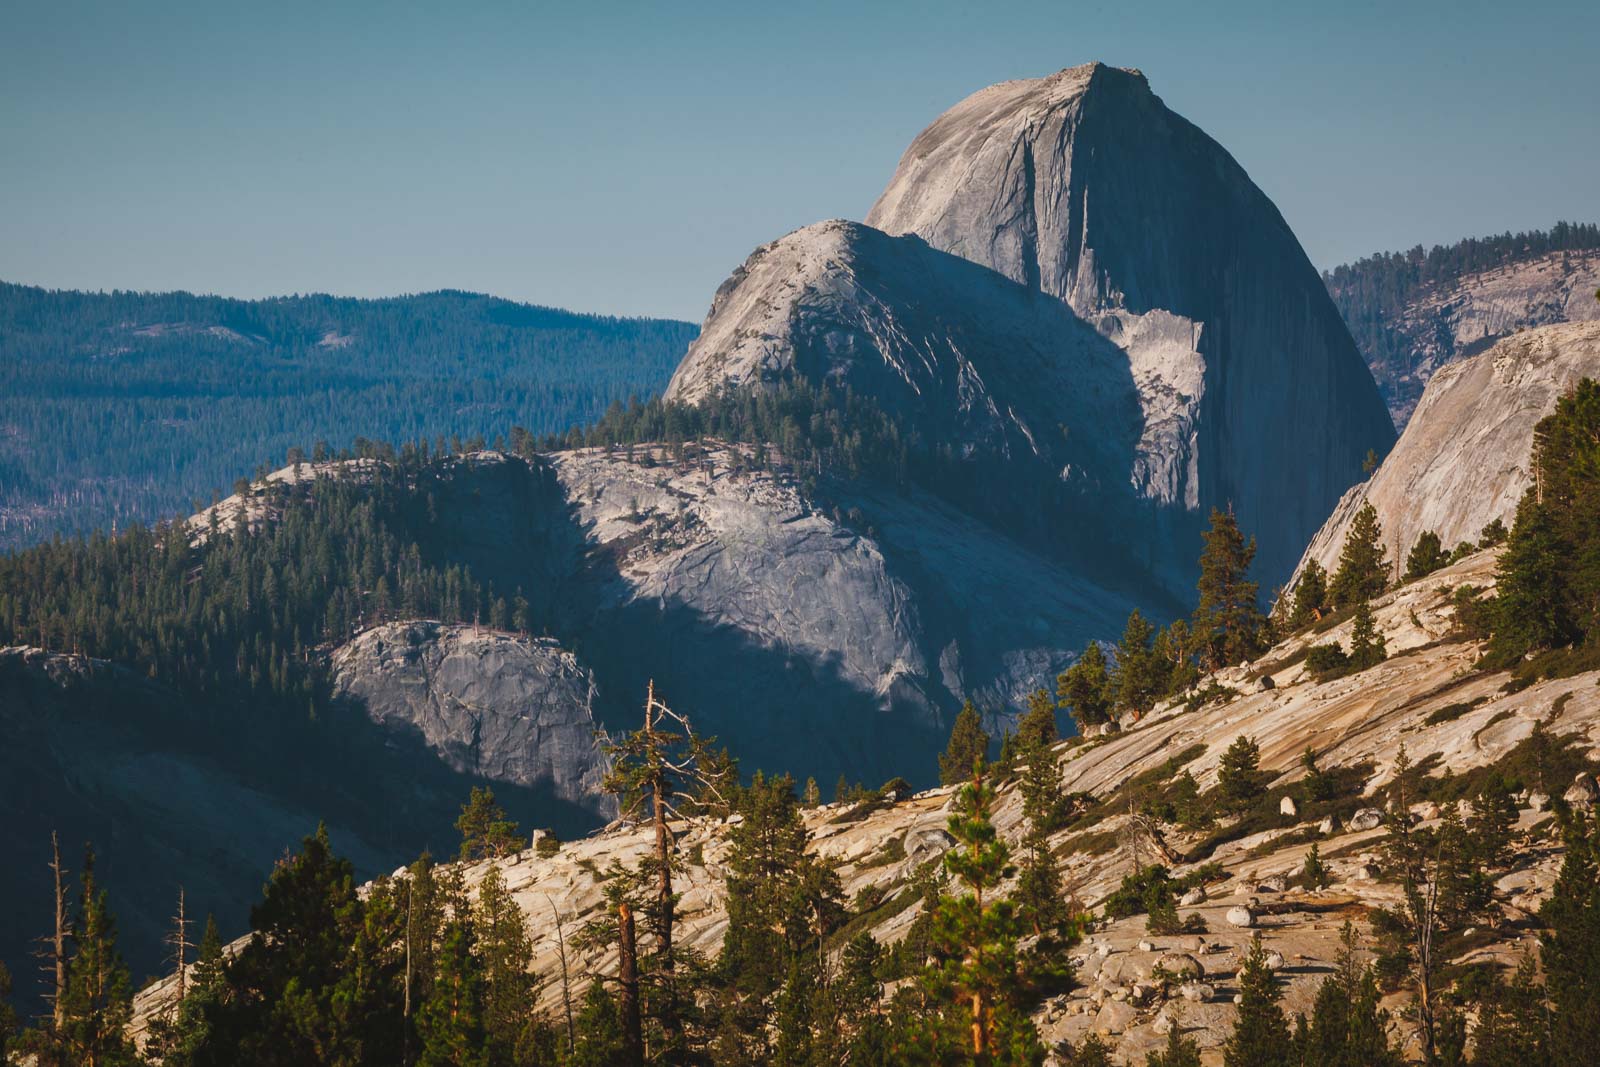
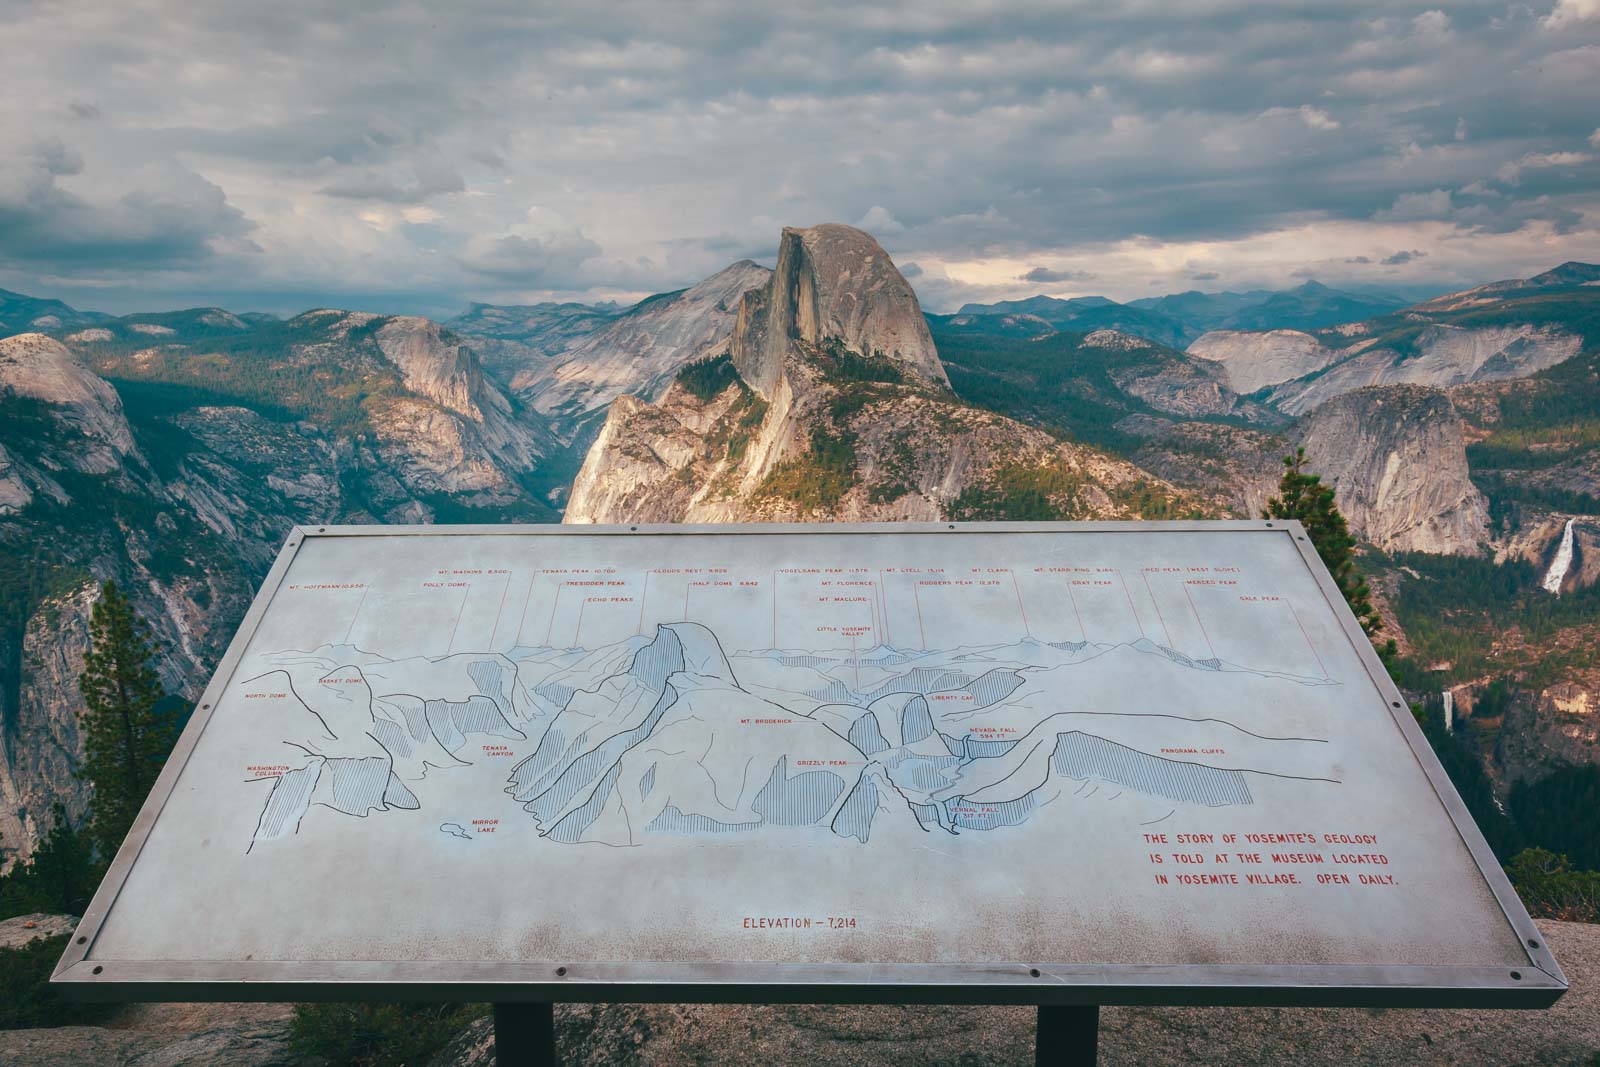
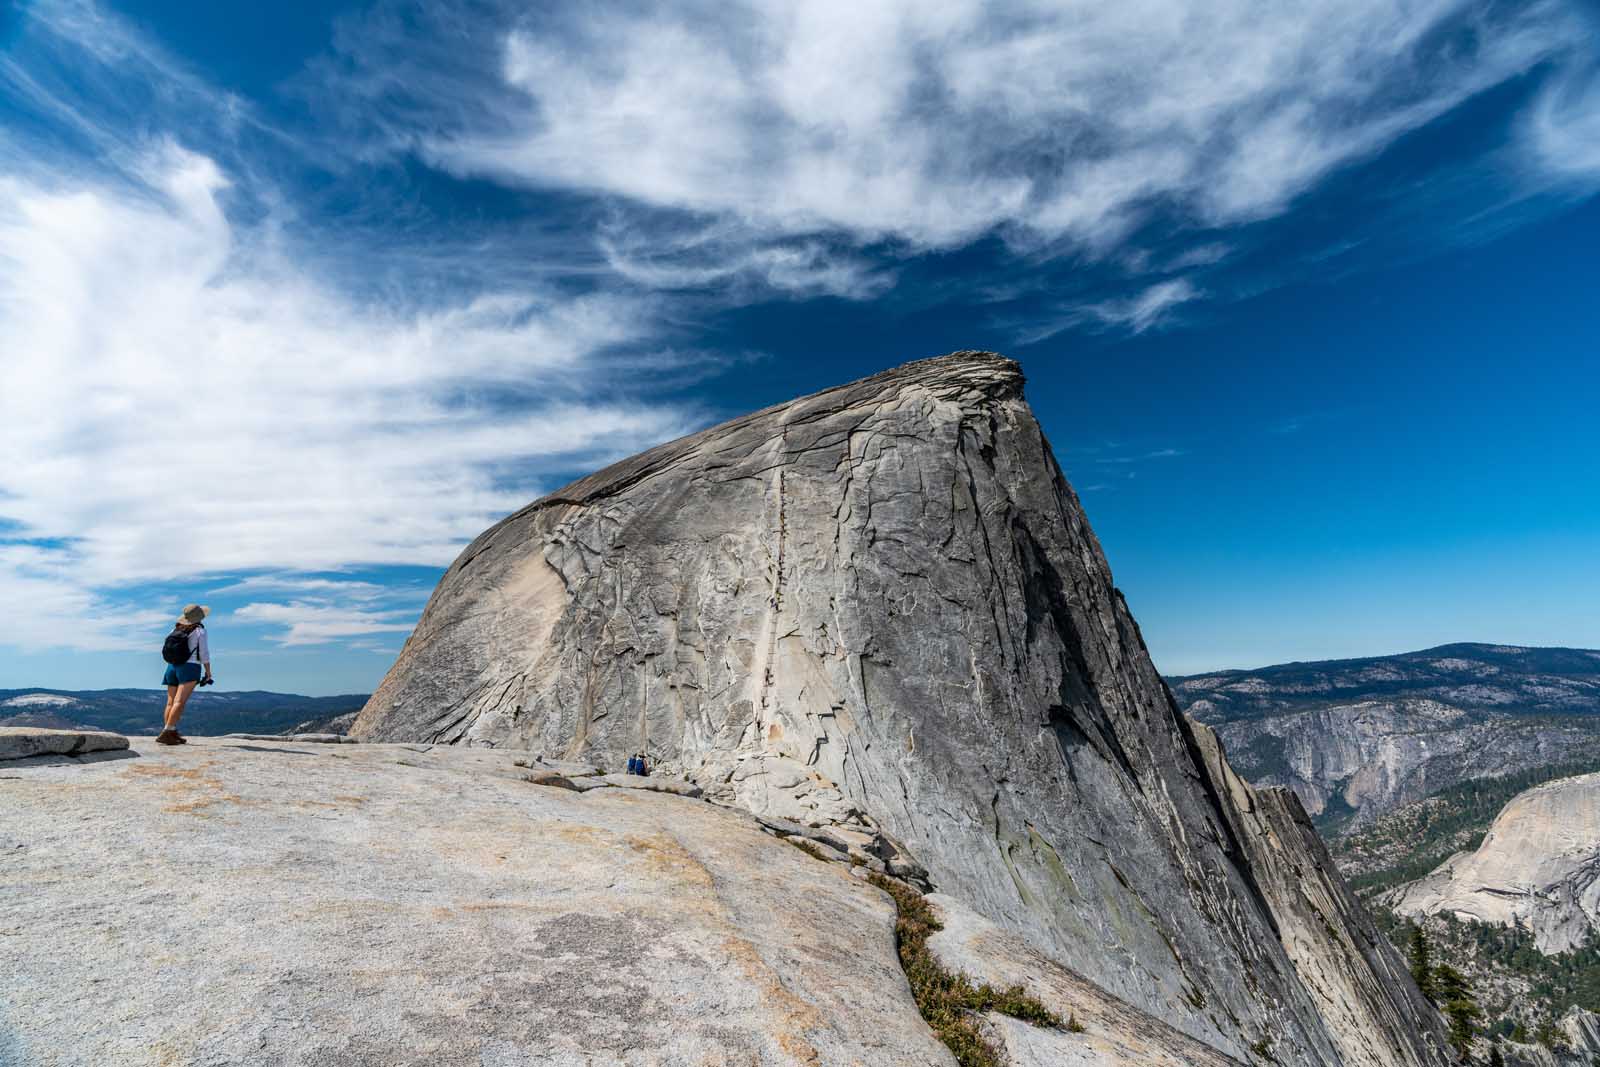
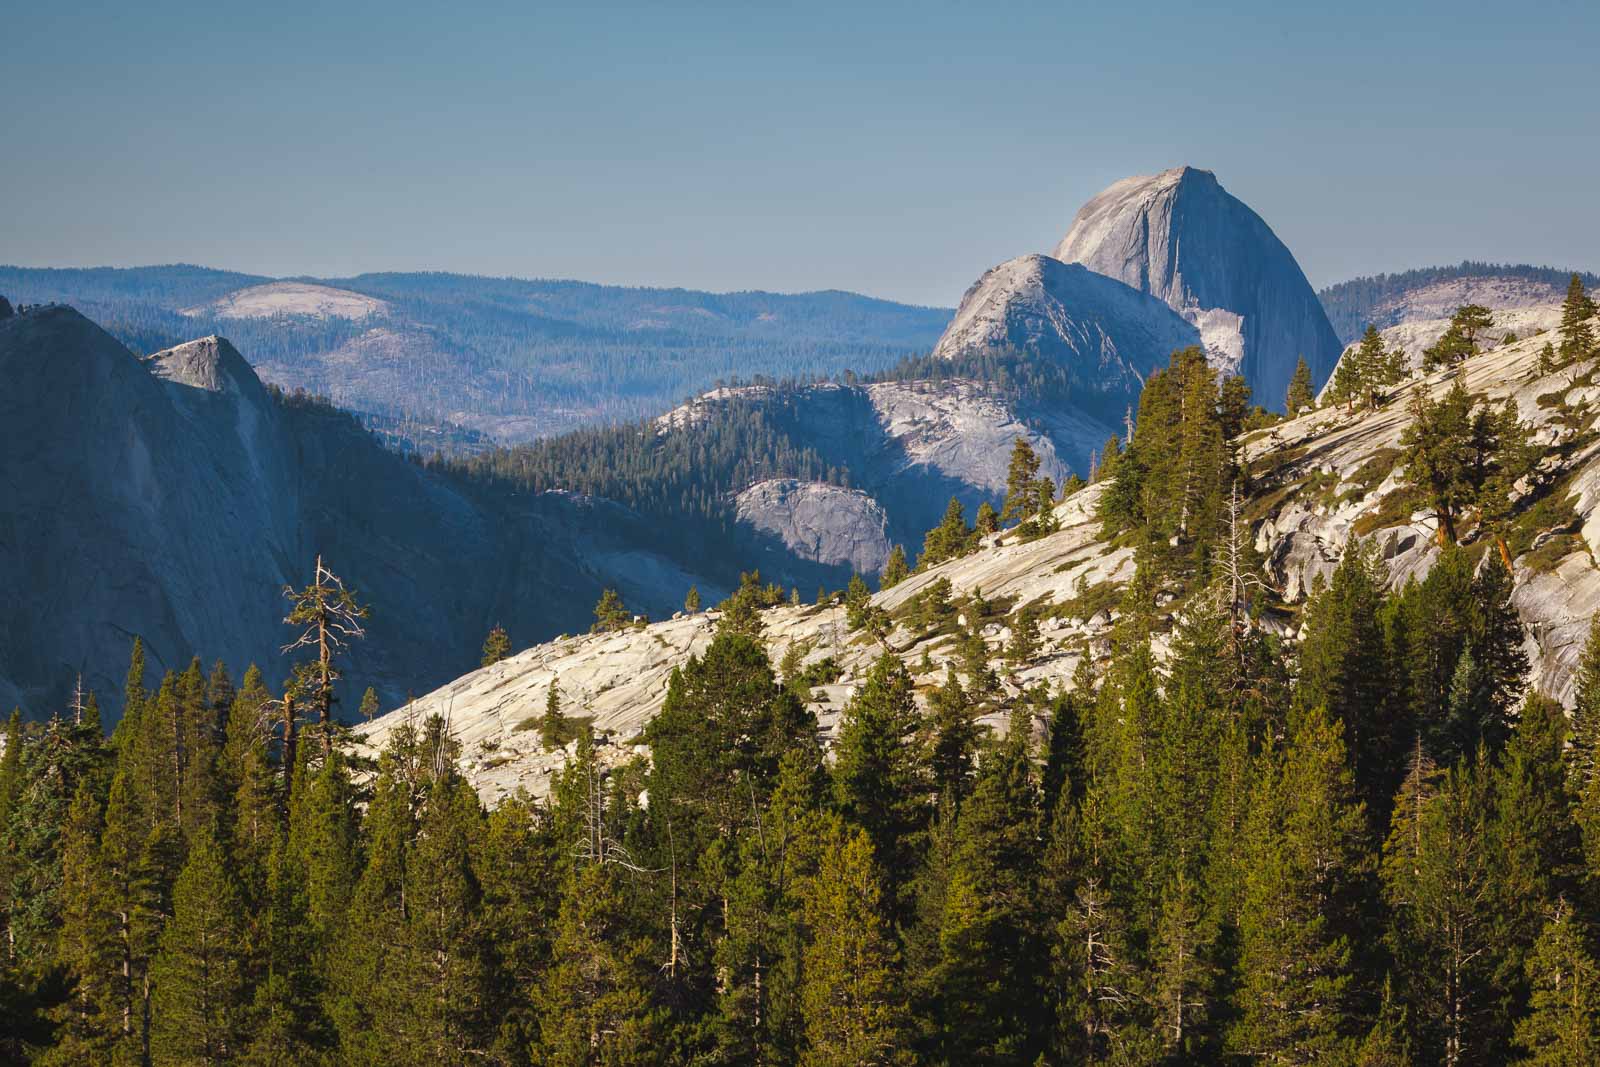
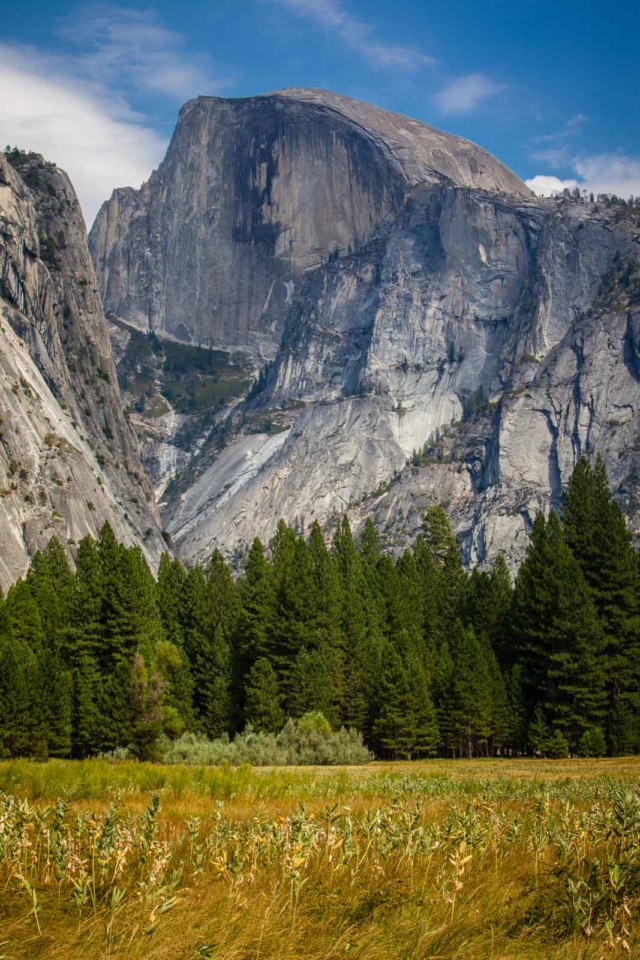
First off, what is Half Dome? Half Dome is a massive granite rock formation located in the east of Yosemite Valley. The dome gets its name from its characteristic shape: a smooth curve on one side and a sheer drop on the other. The rock is, quite literally, a half dome.
Half Dome is an impressive 8,800 feet (2682 meters) above sea level that rises 4,800 feet (1463 meters) above Yosemite Valley. The rock formation is essentially an exposed magma chamber, which became visible due to the uplift and the erosion of rock above and around it. The curved side was shaped by exfoliation – a form of weathering. The flat, vertical side of the rock was also weathered into its current shape, with glaciation helping to further achieve the shape we see today.
Half Dome doesn’t just get its fame from its looks, though; the Half Dome hike is renowned as one of the most challenging hikes in the US. You can put hiking Half Dome right up there with Angel’s Landing in Zion NP, and all the trails that promise an adrenaline rush. Half Dome wasn’t first climbed until 1875, when George Anderson tackled the rock, drilling holes into the granite to add an early version of the current cable route. Nowadays, Half Dome is most popular with day hikers on a round trip. However, there are routes and detours suitable for multi-day hikers as well.
Half Dome is a unique natural attraction and day hike in Yosemite National Park. It is also easily one of the best places to visit in the US if you love outdoor activities. Now that you are more familiar with it let’s dive straight into the rest of our guide.
What to know before you hike Half Dome

One of the most important things we have learned after tackling many challenging trails is that preparation is critical. You don’t want to arrive to find the trail closed, or that you must apply for a Half Dome permit. This section will cover the essentials – the things you should absolutely know before hiking the Half Dome trail.
Yosemite National Park has strict regulations.
Forget simply deciding to climb Half Dome at the last minute; just entering Yosemite National Park can require a good level of planning. The national park has frequent regulations and restrictions, and you can expect park rangers to enforce some of these with fines.
In peak hours, you may need a reservation to enter or drive Yosemite National Park, which you’ll need to arrange before arrival. Other restrictions might just require a detour or two. For example, some roads are strictly closed for maintenance, like Glacier Point Road being closed throughout 2022. You can check the official Yosemite National Park website for road closures or other important messages.
Half Dome hike is only open in certain months
Half Dome hike is not an all-year-round trail. The Half Dome cables are typically taken down on Columbus Day in October and put back up on Memorial Day in May. If you visit after Columbus Day or before Memorial Day, don’t expect to climb Half Dome. Without the cable route intact, it is impossible.
Getting a Half Dome permit
If you didn’t know, Half Dome has a strict permit system. Rather than applying to receive a Half Dome permit, you enter a lottery system to be awarded permits. You can enter the pre-season lottery or try your luck with a daily lottery. The daily lottery runs two days in advance, so you’ll have two days warning if you get the okay to hike Half Dome. There is a cap of 300 hikers per day – we’ll cross our fingers for you.
Hikers who want to camp also need wilderness permits. You can stop overnight at Little Yosemite Valley Campground to add to your exciting experience with wilderness permit reservations.
There are different trail options
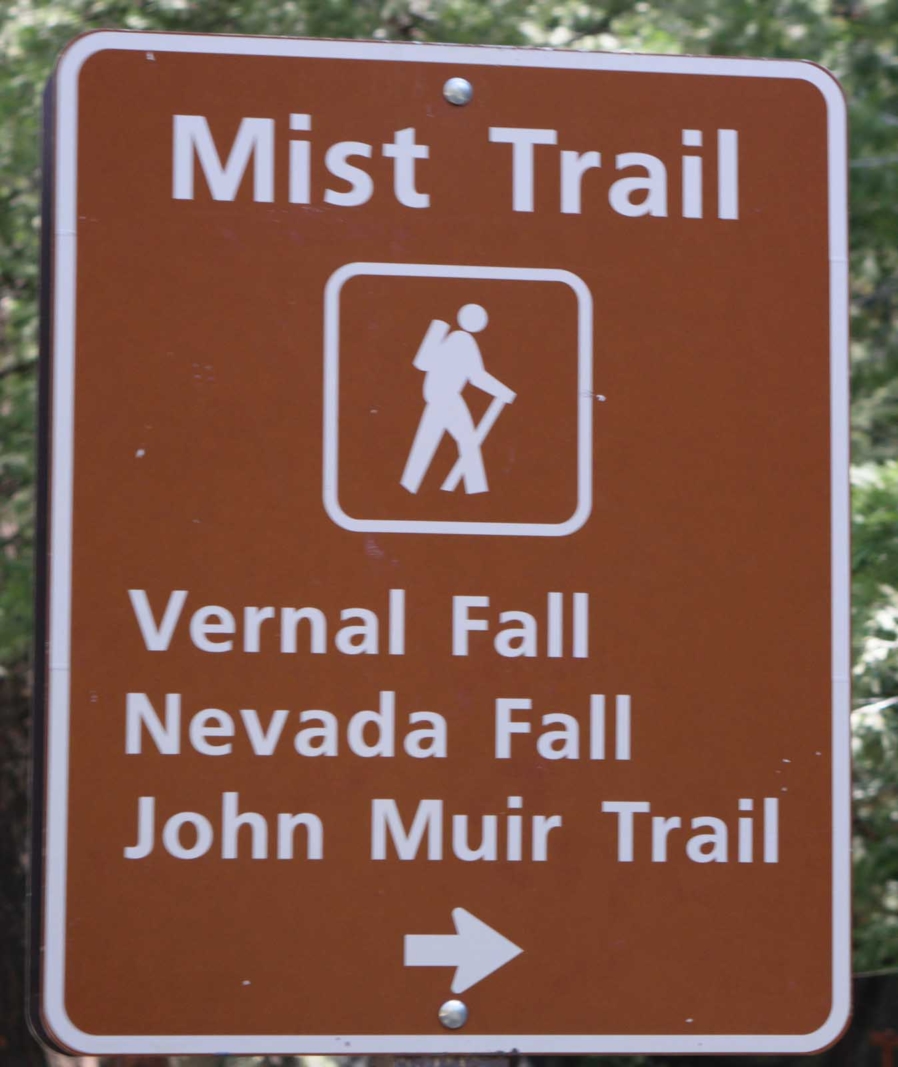
There isn’t just one route that you can take to tackle Half Dome. While there is only one final section (the Half Dome cables), you have different trail options to choose how to get there. After Vernal Falls Bridge, the path branches into two, and you can pick the Mist Trail or John Muir Trail to follow.
Mist Trail and the John Muir Trail are the most popular main route options. However, if you want an extra challenging hike, you can complete the Half Dome Trail via Glacier Point or Tenaya Lake. These routes are less trodden and more demanding in terms of stamina – just make sure you’ve applied for your wilderness permit so that you can camp.
So, which trail should you choose? We’ll take a look at that below.
Which trail to choose to hike Half Dome
Choosing a trail not only impacts your hiking experience but can also define it. You’ll pick between different views, attractions, and whether you complete Half Dome as a single-day round trip or a multi-day adventure. Let’s take a look at your options, leaving you to pick the best route for you to hike Half Dome.
The Muir Trail and Mist Trail are the two trails you can choose between on the main hike. The John Muir Trail is the most popular route and is 17 miles long. It adds 1.5 miles to the trail but passes incredible viewpoints of Nevada Falls and a unique angle of Half Dome. It is also much less steep than the Mist Trail – so you can pick between an extra 1.5 miles of easier terrain or a steep, shorter route.
The Mist Trail is 14 miles in length and involves ascending and descending a set of wet, slippery stairs. You’ll have fantastic views of Vernal Falls as you climb the steps right beside them, getting so close that you are covered in waterfall spray. Still, if the idea of steep, slippery stairs is a no-go for you, we recommend choosing the Muir Trail.
Finally, you could also pick to hike Half Dome from Glacier Point. The 20-mile trail is much less trodden because of its demanding length and the physical fitness it requires. But if you want a challenge, it combines experiencing Half Dome with the beautiful viewpoint at Glacier Point.
If you want more adventure…
So, those are the primary trail options that you’ll get. But what if you want more adventure? You can also tackle the Half Dome hike via these different routes, turning the Half Dome hike into a multi-day experience.
Tenaya Lake is a beautiful alpine lake formed by glacial action and located northeast of Half Dome. You can join hiking Tenaya Lake and Half Dome into one route of 23 miles, which is best tackled over multiple days.
Of course, you can also add an overnight stay in Little Yosemite Valley Campground to the John Muir Trail or Mist Trail. While any overnight stay will require wilderness permits, it is definitely worth the extra effort. And this way, you get the same classic hike and a camping experience.
How to get to Half Dome trailhead
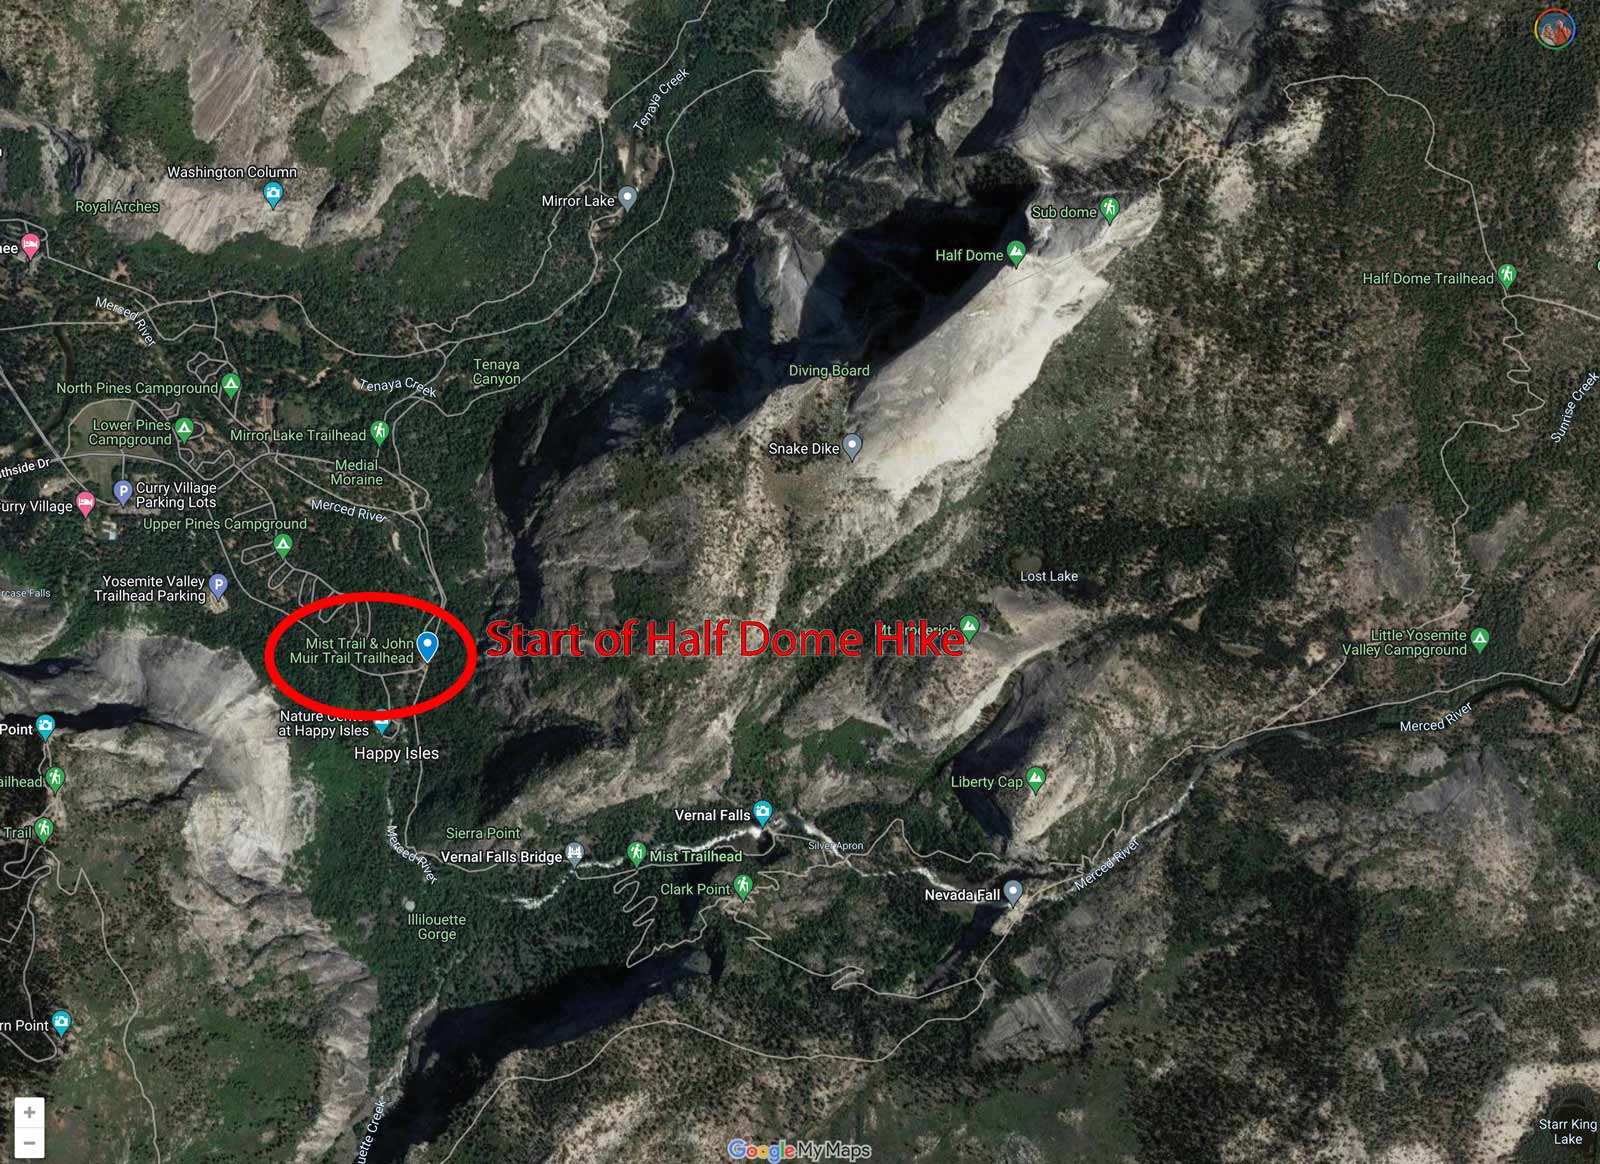
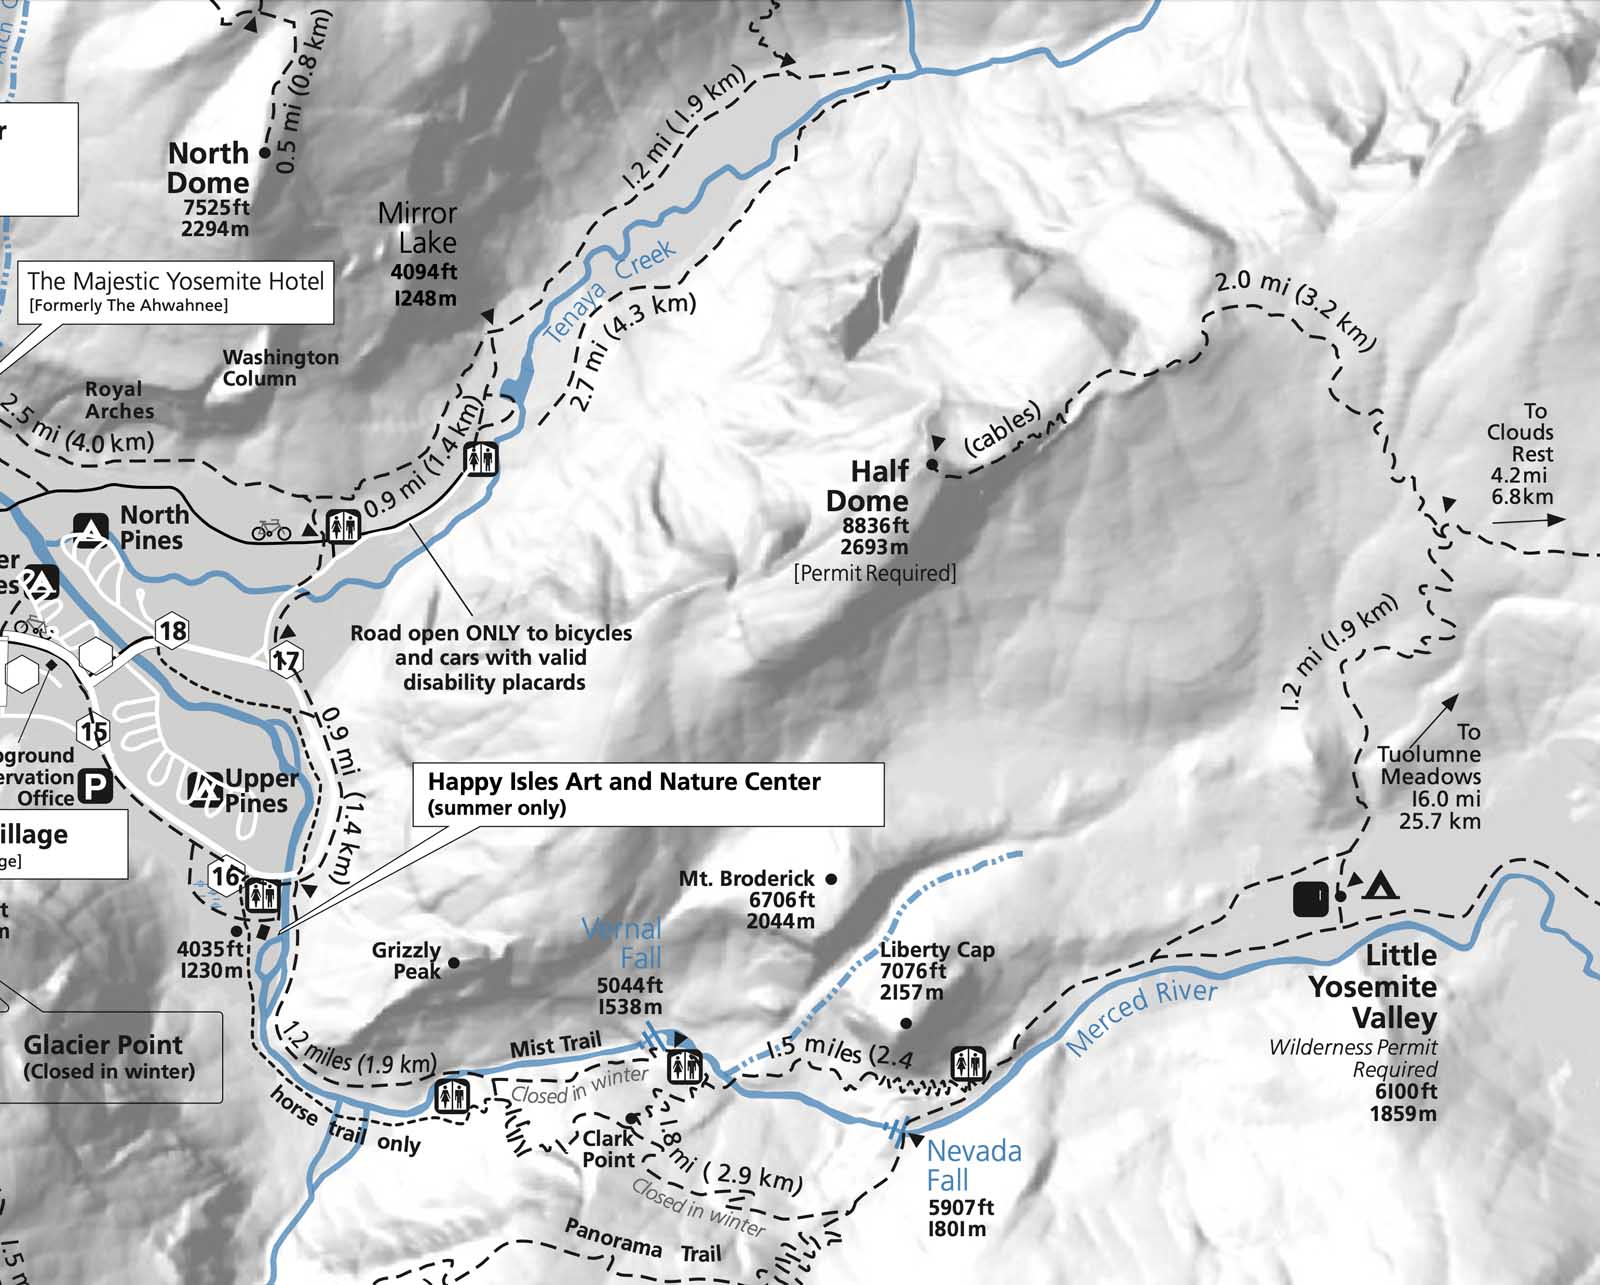
To hike the two most popular trails (the John Muir Trail and Mist Trail), you’ll start at Yosemite Valley Trailhead Parking on the Happy Isle Loop Road. It is then a short 0.5-mile hike from ‘Happy Isles’ Trailhead to Half Dome Trailhead – where your walk begins.
The easiest way to reach the trailhead is to drive, and if you are wondering where to park, don’t worry as the trailhead parking lot has lots of spaces. The roads to Yosemite National Park are well-connected to nearby cities. For instance, driving to the trailhead from San Francisco takes just under four hours.
Another option is to drive to Yosemite National Park and then use the shuttle service. The national park has a regular bus service that connects all the attractions and trailheads. In summer, the East Yosemite Valley service has buses every eight to twelve minutes, and runs between 7 am and 10 pm.
Finally, you could take a guided tour of Half Dome. These tours typically include transfers, like this one here.
What to expect When hiking Half Dome
What to expect when hiking Half Dome is a big question. We’ll cover what to expect when hiking Half Dome in general, then focus on what to expect hiking Half Dome via the Muir trail. Ready? Let’s get into it.
First off, expect to be hiking for upwards of nine hours regardless of which trail you choose – this is a reality that sounds pretty challenging when you say it out loud. You’ll be walking from sunrise and returning in the late evening if you choose a Half Dome day hike. Half Dome is by no means an easy hike, and you should expect to be pushed to the limits of your physical and mental capacity. There are extremely steep and slippery parts of the trail and exposed sections where you’ll have no protection from the sun. By nature, the Half Dome hike is challenging.
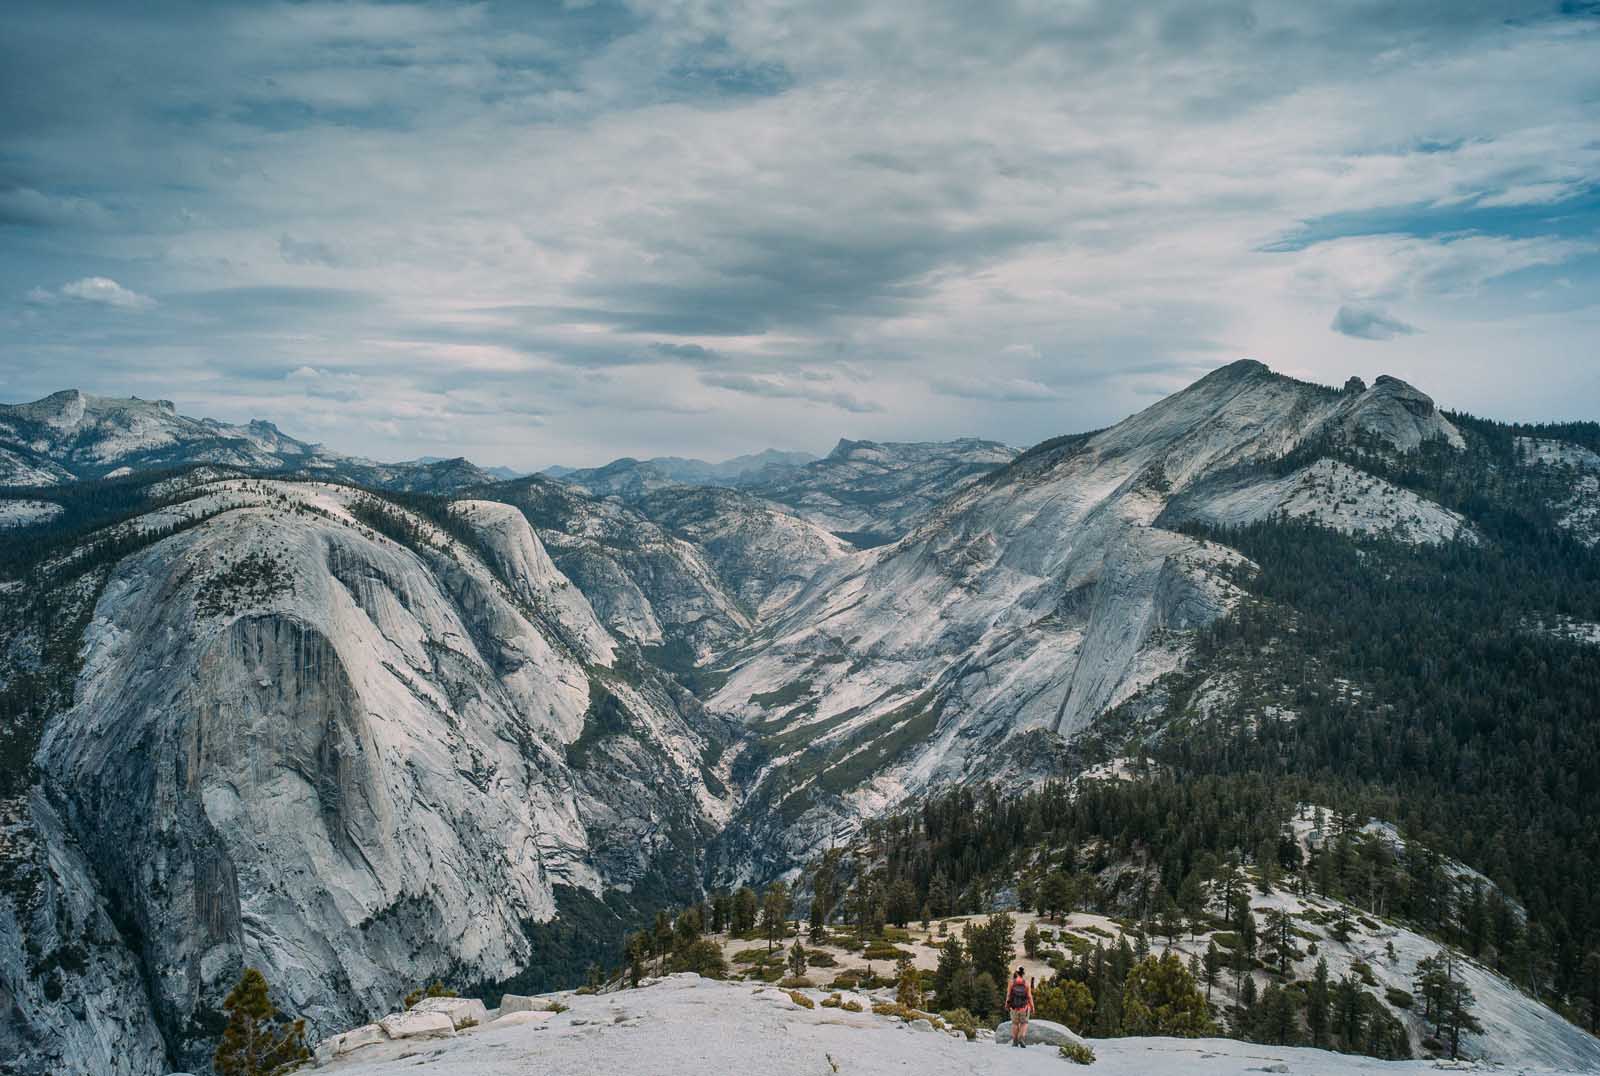
However, you can also expect Half Dome to be one of the most rewarding hikes in the US. Along the trail, you’ll find stunning waterfalls and serene viewpoints and face many challenges that instill a strong sense of achievement. Since you have to get lucky to bag Half Dome permits, there’s a great atmosphere amongst those hiking Half Dome Trail. After all, a hike to Half Dome is a privilege. The supportive atmosphere is what many people claim to be one of the best things on a walk to Half Dome.
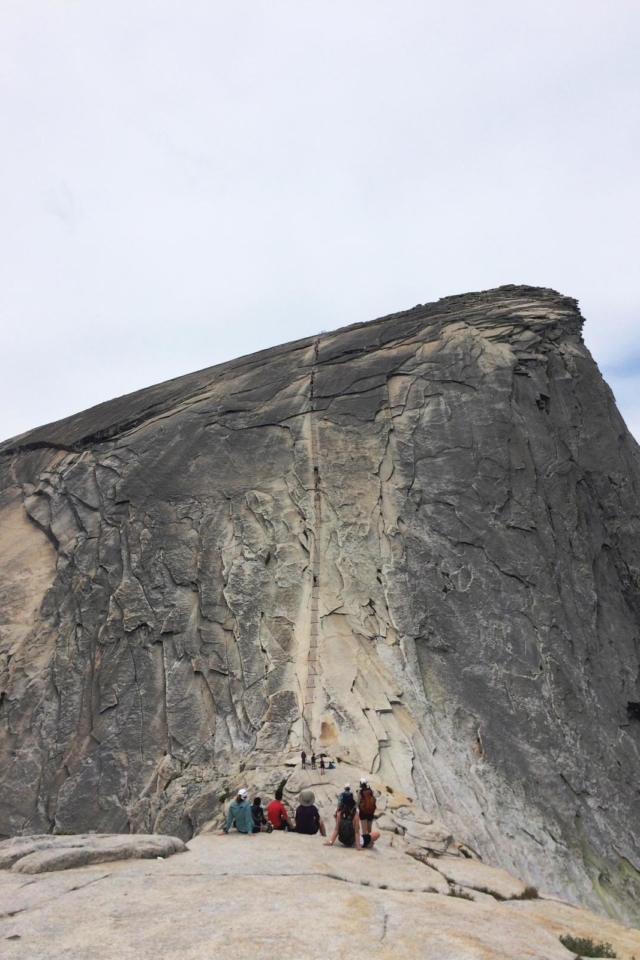
It’s said that around 20-30% of hikers actually turn back when they reach the cable route, which is by far the scariest bit of the hike. By the time you reach the cable route, though, there’s usually a steadily moving queue forming. You can count on a few words of encouragement or reassurance from other hikers. Whether you continue slowly to tackle the last 400 feet or decide to turn around, the positive atmosphere gives a strong sense of “we are all in this together”.
In terms of facilities, the only flush toilets available are at Vernal Falls Footbridge. You will find composting toilets near Emerald Pool, Nevada Falls, and Little Yosemite Valley. Just remember to bring your own toilet paper. At Vernal Falls Footbridge you can fill up your water, so plan a refill stop there on your way up and down.
So, what can you expect from hiking the Muir Trail? Well, the route itself is straightforward to navigate. Starting from the parking lot by the ‘Happy Isles’ Trailhead, it is a leisurely stroll along the Happy Isle Loop Road for about a half mile. You’ll cross the Merced River over the Happy Isles Bridge, then take a right at the fork to join the Muir Trail.

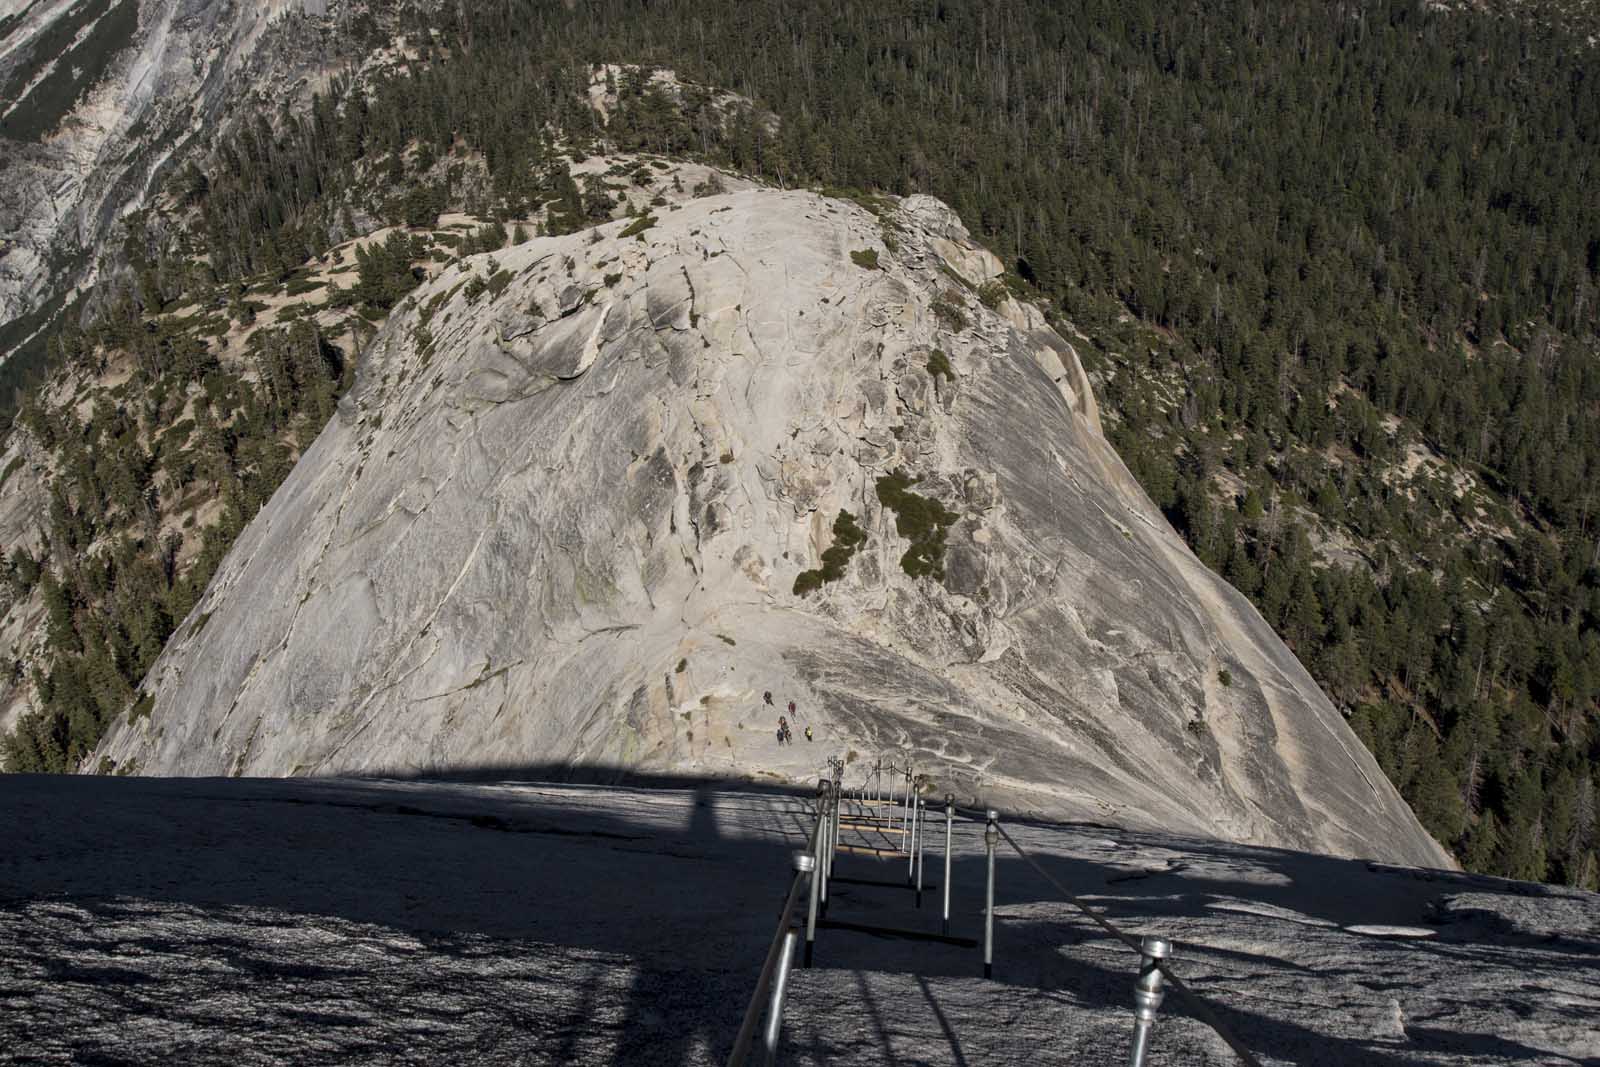
Looping past Sierra Point, you cross the Merced River for a second time over Vernal Falls Bridge, then join the uphill switchbacks as the trail winds to climb out of the valley floor. From here, you’ll pass Nevada Falls, Liberty Cap, and Little Yosemite Valley, finally reaching the Half Dome trailhead. Before you tackle the metal cables, you’ll hike to the Sub Dome summit first – which has stunning panoramas over Yosemite.

You’ll then complete the Half Dome cables, which is a 400-foot section of a climb on a 45–55-degree angle. There are wooden supports set at every 15 feet or so, allowing you a perch to rest on, and two metal cables running either side of the track for you to support and balance yourself. A via feratta harness is optional, although more and more people are bringing climbing equipment following recent accidents. After completing the famed (and feared) cable route, you’ll reach the top of Half Dome.
The John Muir Trail has a total elevation gain of 1,582 meters and is a challenging route. On average, it takes ten hours to complete the return hike. However, we recommend allowing twelve hours just in case. It is nice to be able to stop at attractions like Nevada Falls along the way, and there is plenty to admire before you reach Half Dome.
What are the best things to see and do on the Half Dome hike?
As we’ve said above, there are plenty of things to see and do on your way to summit Half Dome. Most of the natural attractions on the way double up as prominent points for navigation, so you’ll naturally get to sightsee as you navigate your way to the summit. This section will cover the best things to see and do along the way.
Nevada Fall
The Merced River makes the Half Dome hike a fascinating trail, as it has many waterfalls and dramatic river scenes to admire along the way. Nevada Fall is an impressive waterfall that plunges off its granite cliff face and down into the valley below. Hikers get a view of the cascade on the hike to Half Dome, then cross the river just upstream of the falls.
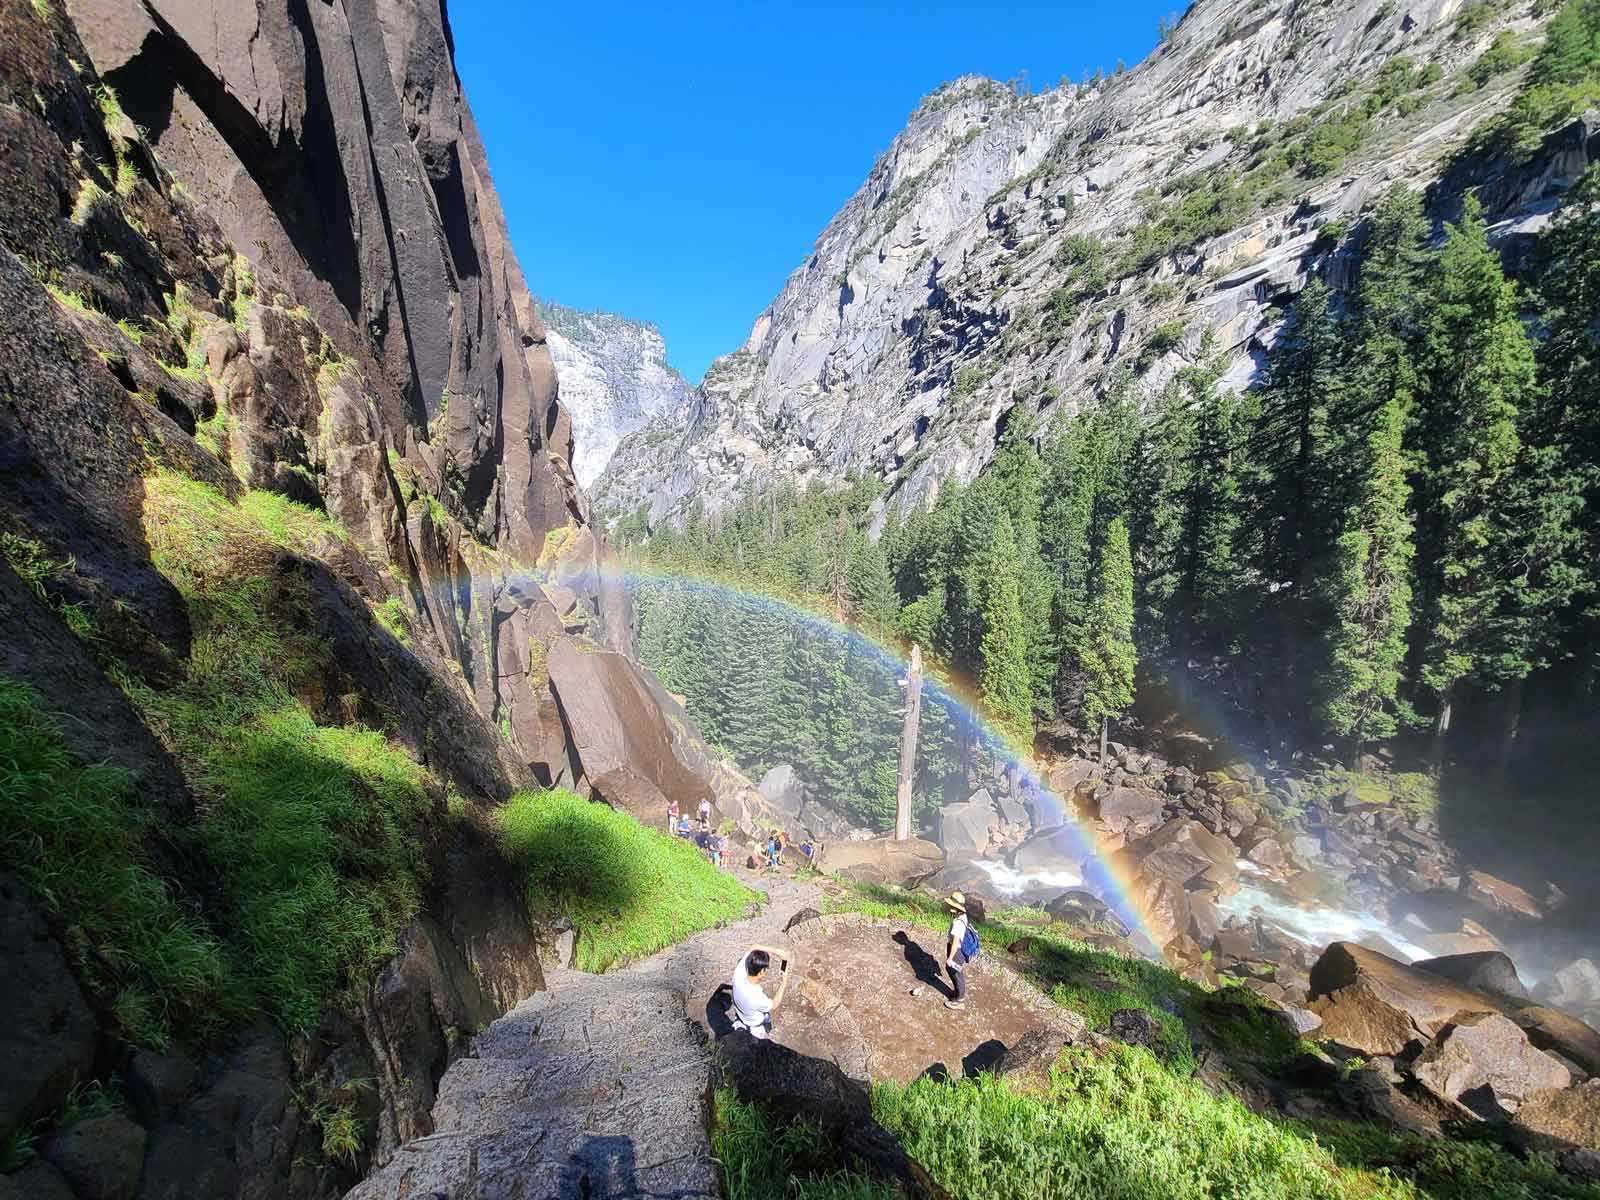
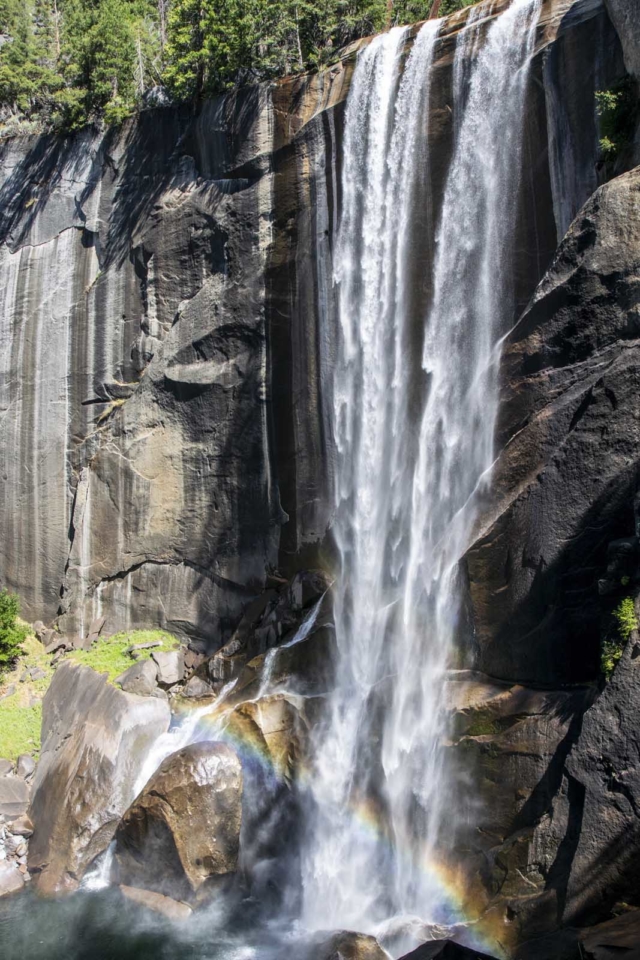
Vernal Fall
Vernal Fall is another dramatic waterfall courtesy of the Merced River. The waterfall drops 317 feet off a granite cliff face and is located just before Nevada Fall. You can get close to Vernal Fall via the Mist Trail, climbing up over 600 rough-cut granite steps and getting covered by the waterfall spray.
Sub Dome
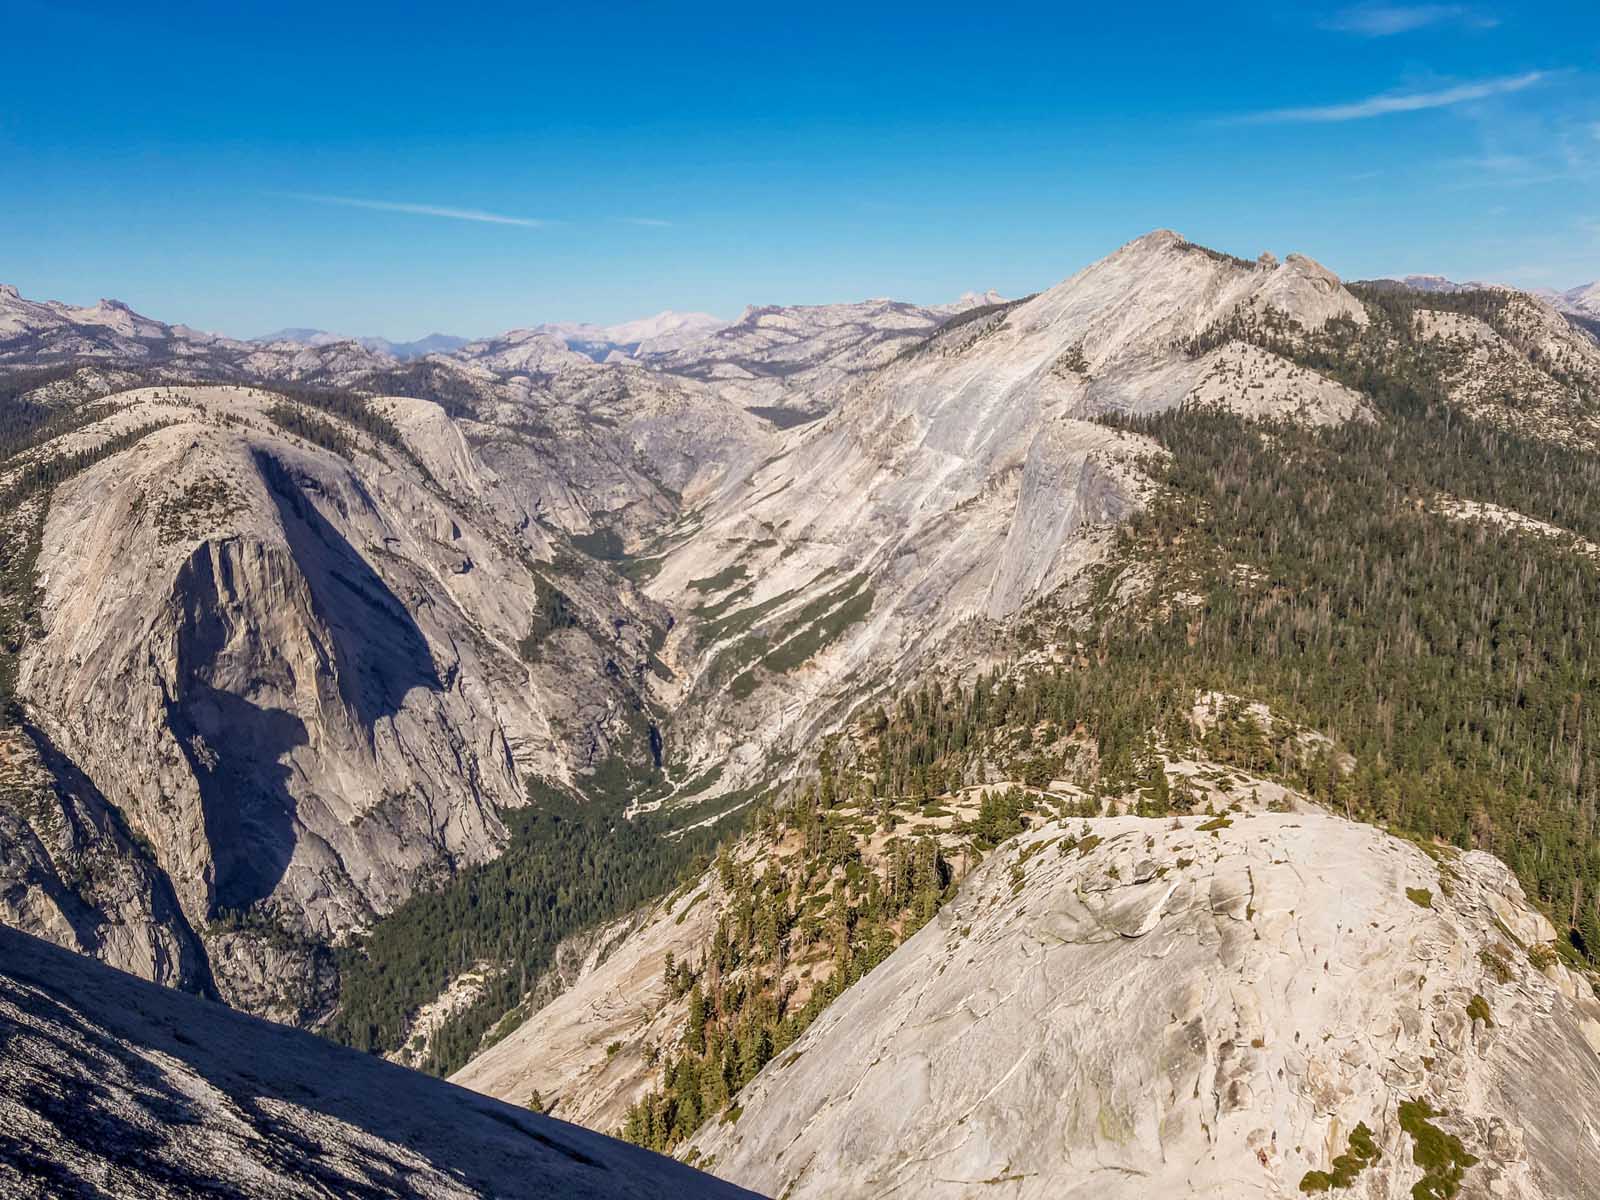
In a rush to get to the top of Half Dome, many people don’t realize how beautiful Sub Dome will be. Sub Dome is a great taster of the final climb. You can enjoy spectacular views over the surrounding granite domes and woodland below.
Little Yosemite Valley
You pass through Little Yosemite Valley on a sandy trail, cutting through woodland and wilderness. Little Yosemite Valley is a beautiful landscape, and you may spot black bears, deer, coyotes, and even bobcats if you’ve got a sharp eye.
Liberty Cap
Liberty Cap is a massive granite dome, not unlike Half Dome. You’ll pass the dome just after you pass Nevada Fall. However, you will also be able to admire Liberty Cap from the summit of Sub Dome and Half Dome. Keep your eyes peeled as it is an impressive natural landmark.
Olmsted Point
Olmsted Point might not be exactly on your route, but you can always add it on as a detour. The scenic lookout offers views over Half Dome and Tanaya Canyon. It is a good add-on if you are tackling Half Dome on a multi-day hike since you won’t be pushing yourself for a single-day roundtrip. If you don’t have time to hike to Olmsted Point, drive back on Tioga Road so you can pull in and visit instead. It is an excellent lookout to appreciate the climb you’ve just completed.
Clouds Rest
Clouds Rest is another worthy add-on. Be warned that the mountain is a strenuous hike. Still, it is worth considering if you are tackling Half Dome over multiple days and have an excellent fitness level. The views from the summit are stunning, and it is a great hike to get a different perspective of Half Dome. Most people combine hiking up Clouds Rest and Half Dome over three to four days.
Glacier Point
As we covered earlier, some people may wish to start their Half Dome hike at Glacier Point rather than Happy Isles. While this route is a lot longer, it is stunning, and you’ll be rewarded with beautiful panoramas. If hiking 20 miles of difficult terrain in a day doesn’t put you off, Glacier Point is one of the best things to see on a Half Dome hike. You’ll also find Washburn Point and Glacier Point Trailside Museum along Glacier Point Road, the road you drive to access the trailhead.
Please note that road improvements have closed Glacier Point road for all of 2022 and you can expect delays during 2023 until the road maintenance is finished.
What to bring on the Half Dome hike
As we have said, preparation is vital. There are many hikes in the US that you can show up to in casual, everyday clothes and running shoes and have a fantastic time. However, knowing that the Half Dome hike requires reliable clothes and gear is essential. At the very least, you’ll want to leave your worn-out runners at home, and at the most, you may even want to bring climbing equipment like a harness. This section will cover all the best things to bring on a Half Dome hike.
To start with, you’ll need to decide if you are planning a backpacking trip or a strenuous day hike. If you plan a multi-day backpacking trip, you’ll need to pack more food and water supplies, plus all of your camping gear. Little Yosemite Valley Campground allows you to leave your tent and non-valuables at the campsite while you hike the final stretch of the Half Dome trail.
This is good news as you won’t have to tackle the Half Dome cables with a tent in your backpack. With this in mind, though, you should limit the valuables you bring so that you can safely leave things in your tent. You will also need a bear box to store food safely while you are away.
You should always carry plenty of water, toilet paper, sunscreen, bear spray, and a Half Dome Trail map since the phone signal can be sketchy. Half Dome hikers tackling the round trip in a day may require less food and water, but it is wise to carry a little more than you think you’ll need. A few sugary snacks can be great for giving you that needed boost along the trickiest parts of the trail.
You may want to bring a basic first aid kit and a Via Ferrata climbing harness. A first aid kit never goes amiss, and as long as it isn’t too bulky to fit in your backpack, it can be helpful in minor accidents. The Via Ferrata climbing harness will be handy if you want to strap yourself in for extra security on the Half Dome cables. The Half Dome cables aren’t designed to be tackled as a Via Ferrata route. In fact, the poles can occasionally come loose – so climbing strapped to the cables isn’t risk-free. However, it does provide some extra security and peace of mind. You may wish to take the extra precaution if you have a fear of heights or if it is really crowded.
Last but not least, what clothes should you bring and wear? Sturdy footwear with good grip goes without saying. The slick rock on the Half Domes cables section is polished and slippery, so if you add footwear with a bad grip into the mix, it is a disaster waiting to happen. The stairway section by Vernal Fall also requires good grip since it gets slippery with waterfall spray. Similarly, descending the sandy area near Little Yosemite Valley requires good ankle support when navigating your way down the path feeling tired and weak.
A peaked hat is another firm recommendation. Much of the trail is exposed to the elements, especially on the final climb up the Half Dome cables. The last thing you want is to be battling heatstroke and sunburn when you are already on the most challenging section of the climb. You’ll also appreciate a thick pair of gloves with a good grip for the Half Dome cables section.
As the rock is slippery in this section, you’ll heavily rely on upper body strength to support yourself by holding the metal cables. Gloves will help prevent blisters and make the task much easier for you. Also, when you are finished, think about giving your gloves to another climber. That way you don’t have to carry them down or leave them there.
Finally, you’ll need all the standard hiking basics. Make sure to bring layers (including a waterproof, windproof coat) and comfortable, well-fitting clothes.
Best time to hike to Half Dome
The fact that the Half Dome cables are only available from Memorial Day to Columbus Day already narrows down the best time to hike Half Dome. If you want to tackle the hike, you will have to get a Half Dome permit to allow you to visit between May and October.
Typically, September is the quietest time to climb Half Dome. Day hikers should set off as early as possible to maximize their daylight hours since you get fewer daylight hours in September than in the height of summer. You can always book accommodation in Curry Village, just a fifteen-minute walk from the ‘Happy Isles’ trailhead. It is a great nearby place to stay, so you can start your hike nice and early.
In September, you’ll enjoy fewer crowds, and the temperatures should be cooler, making climbing more enjoyable. You should find that campsites have more space too, and who knows, maybe you’ll get luckier in the permit lottery if there are fewer entries.
If you are keen on climbing the stairs with as few people as possible then plan to arrive around 8 am to the cables. If you get there between 11 am and 12 pm you can guarantee it will be packed and you might have to wait in line just to do the final section.
Important Note: You’ll want to avoid hiking Half Dome if there are storms or heavy rain forecasted. Weather conditions can turn the trail extremely dangerous. If a storm appears nearby, the best thing you can do is turn around or take shelter in a building like a toilet block if possible.
Half Dome permits might be exciting to win, but it is never worth continuing on a high-risk trail when you can just re-enter the lottery. Heavy rain can make the trail perfectly inaccessible, so the hiking season for Half Dome coincides with the driest months.
How difficult is the Half Dome hike?

In short, the Half Dome hike is difficult. The mileage and elevation gain are both substantial, and the challenging sections have real risks. More than twenty people have died tackling the Half Dome trail, and over forty people have died on the routes used to access the final section. The risks are real, and you need to be active when prioritizing your safety. Successful Half Dome hikers are brave but definitely not stupid.
The trail lengths vary from 14.2 miles to 23 miles, so you’ll need to choose the trail that best suits you and your fitness skills. In theory, you could tackle the Half Dome hike without training. Still, you’d need to be otherwise fit and healthy with a good baseline level of fitness. You’ll be more successful if you do some training leading up to the hike.
Plus, hiking while you are exhausted raises the likelihood of slipping and having an accident, so you’ll be able to hike stronger and safer if your fitness levels are higher.
If you are unsure whether you are physically fit enough to complete a round trip in a single day, just apply for a wilderness permit. This way, you can camp at Little Yosemite Valley Campground and break up the distance over two days.
To Conclude
Half Dome hike is easily one of the US’s most popular hiking trails – holding a number one spot on many people’s bucket lists. It may be challenging, but it is the perfect example of how ‘nothing good in life comes easy. The enormous grey dome is a much-loved and respected landmark in Yosemite and is well worth tackling if you can.
Just remember, there is no shame in getting to the cables and turning around. If you don’t feel confident then don’t put yourself or others in danger. The views up to that point are more than enough reason to tackle this hike.
Feeling inspired? You may want to check out some of our other favorite hikes in California or the United States as a whole. Of course, there are also many different things to do in Yosemite National Park. You will probably want to dedicate a large chunk of time to explore the surrounding area once you’ve completed Half Dome. A trip to any destination in the national park will be memorable, and we hope you have an inspiring and successful trip. Also read: Where to Stay in Yosemite National Park
Plan Your Trip to More National Parks in the US
- Best National Parks – USA Edition
- 12 Best Hikes in Shenandoah National Park
- 22 Amazing Things to do in Olympic National Park
- Best Hikes in Mount Rainier National Park
- 15 Best Hikes in Canyonlands National Park
- 14 Best Hikes in Arches National Park
- 11 Best Hikes in Joshua Tree National Park
- Best Hikes in the Valley of Fire State Park