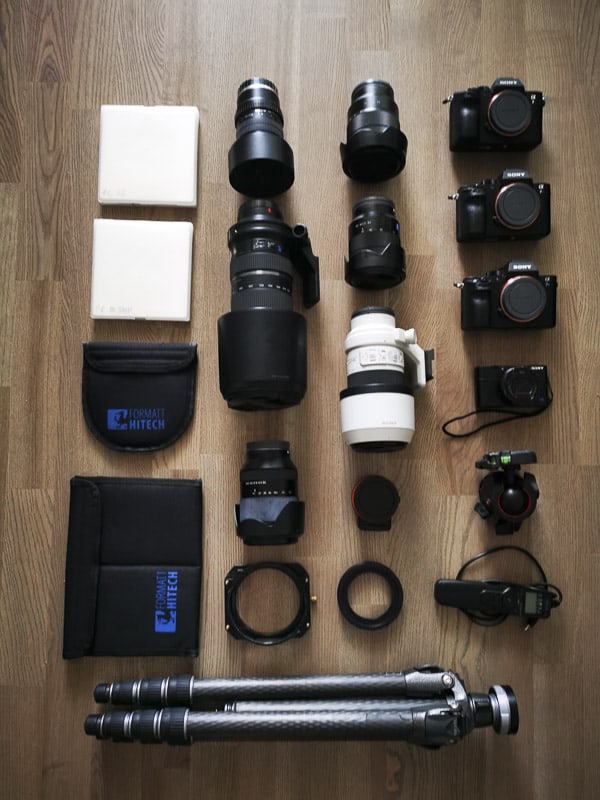
What kind of travel photography gear do you use? It is probably one of the most common questions I get after being a professional travel photographer and blogger for the last 12 years. So, I thought I would break down exactly what is in my camera bag right now.
This list might be a little overwhelming but what you have to keep in mind is that this is my job. I carry far more gear today than I did when I started out. Most of you will only need a fraction of this photography gear and if you are just starting out as a travel photographer then you are going to want to check out a few kit suggestions at the bottom of this post I put together for first-time travel photographers.
Table of Contents
My Travel Photography Gear Guide
It is important to note that I was a Canon guy for a long time. I actually started with a Canon AE1 (which I still have by the way). But as technology got better and lighter mirrorless bodies came along, I decided to switch to Sony.
Why Sony you ask? Because I believe they have the best mirrorless technology, great native lenses and are really at the forefront of developing the genre.
Travel Photography – Cameras
Sony a7R III: Main Camera Body
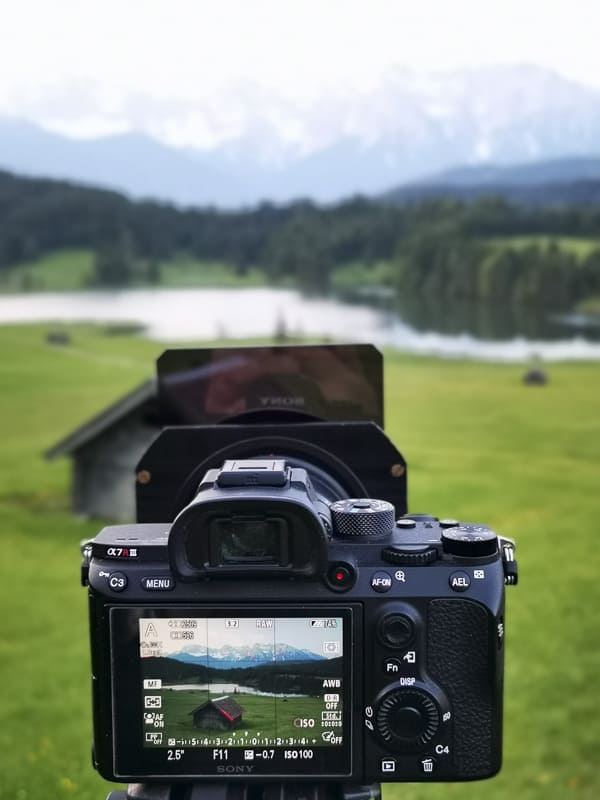
I have been using Sony Mirrorless Cameras and lenses for 7 years now and have found they have really stood up to all the abuse a travel photographer can throw at them. I currently use the Sony a7R III as my main camera body and I have a second camera body that is currently the Sony a7R II. I haven’t upgraded yet, but when I do, it will be the Sony a7R IV. I don’t feel the need to upgrade every year, and find that my two cameras are doing great for me at the moment.
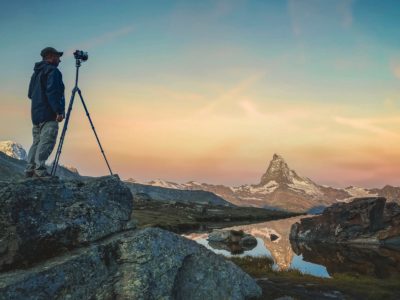
I always carry 2 camera bodies. I find having two camera bodies important so that I don’t have to switch lenses and I am covered if something goes wrong with my main body. I carry a long lens on one shoulder and a wide lens on the other. That way I am prepared for any situation.
a7R III
The Sony a7R III is my main camera body. It is 42.4-megapixel full-frame camera. The A7R II used to be my main body, but when they upgraded the sensor, focussing speed, and added 10fps shooting I had to upgrade. What I love about this camera is that it is versatile enough to capture incredible landscape images, portraits as well as being great for wildlife photography.
Backup Camera Body: Sony a7R II
The Sony a7R II is the second body I use. It too is a full-frame camera and has a 42mp sensor. I usually put the longer lens on this camera and keep my wide-angle on the A7R III. Not everyone will need a second body, but when you do this professionally and you are hired to get the shot, you can’t use gear failure as an excuse for not delivering.
Main Travel Camera Lenses

Sony 16-35mm F/2.8 GM – Wide Angle Lens
I used Sony 16-35mm F/2.8 GM as my main travel camera lens. It is the lens I use the most. The 16mm is perfect for landscape photography as well as cityscapes and for those interior shots when you just have to get everything in the shot. The image quality of this lens has blown me away.
Cheaper Option – F/4 16-35mm
If you shoot a lot of landscapes or wide-angle perspective shots this is the lens for you. I started with the F/4 16-35mm which is a cheaper option and performs very well, but I wanted something faster for low light situations.
Sony 24-70mm F/2.8 GM – Medium Zoom Lens
The Sony 24-70mm F/2.8 GM focal length is a perfect walk-around lens for a travel photographer. At 24mm it is wide enough to capture great landscapes and at 70mm works as a great portrait focal length.
Cheaper version – 24-70mm F/4
If you can only afford one lens then I suggest the 24-70mm F/2.8 or the more economical 24-70mm F/4 version just because it is so versatile. When I am in a situation, like hiking in the remote regions of Bhutan, and can take only one lens with me then this is my first choice.
Sony 70-200 F/4 G – Telephoto Lens
The Sony 70-200 F/4 G lens completes the kit I have with me all of the time. It took Sony a little while to come out with this one but man it was worth the wait. The image quality of the Sony 70-200 f/4 is awesome, the bokeh effect is great (so close to that of my old Canon 70-200 2.8) and most of all it is so light.
I used to use it for wildlife photography in the beginning but have since added a dedicated lens for that. In a pinch, you could add a 1.6 or 2x teleconverter to it and get it up to 400mm, but I found the image quality take a bit of a hit when you do this.
These 3 lenses cover the widest range of focal lengths that you will use as a travel photographer. You may need some specialty lenses down the road, but this 3 lens package has served me well over the past 10 years of shooting professionally.
Specialty Lenses
These are lenses that are only in my bag when they are needed. I don’t carry them with me all of the time. If I know I am going on safari o will be near any dark skies I pack these in addition to my regular photography kit.
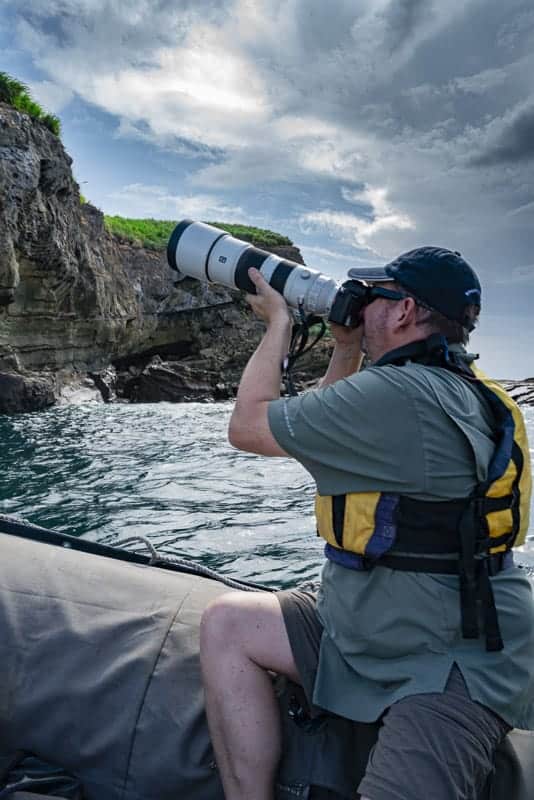
Sony 200-600 F/5.6-6.3 – Super Telephoto
When I started doing more wildlife photography I found I needed a longer lens. I took the Sony 200-600 F/5.6-6.3 lens with me to Costa Rica and fell in love with it. The focusing is fast, it is not too expensive (compared to other lenses in this range) and the image quality of the Sony 200-600 was impeccable. Combine these features with the 5-axis in-body stabilization of the A7R III and I found I could even shoot with this lens handheld!
Rokinon 14mm F/2.8 – Ultra Wide Lens
When I was looking for an ultra-wide-angle lens for astrophotography the Rokinon 14mm F/2.8 one was at the top of my list. It has everything I need; a fast aperture is wide-angle and is sharp edge to edge. I would really recommend this if you are just getting into astrophotography. There is no use spending big bucks on something until you find out whether you like it or not.
What could be a drawback for some people is that this is a manual lens. This means that it has no autofocus and you have to adjust the aperture on the barrel. If you can deal with this it is a steal at $342.
GoPro Hero 9 – Action Camera
We have been using GoPro cameras since the original came out. Since we do a lot of adventures the GoPro Hero 9 comes in handy when it is just not possible to bring the Sony. We have strapped it to cars, snowboards, mountain bikes, planes, and just about anything you can think of. You can bring this camera anywhere. I also love that it charges via USB, can be controlled via wifi from a smartphone, and comes with a remote.
GoPro Accessories
The GoPro is a great camera, but without accessories, you can’t use it to its full potential. These are the essential accessories for your gopro you should carry at a minimum:
- Sticky Mounts – I carry these so I can stick them to helmets, kayaks and other sporting equipment that I rent.
- GoPro Head Strap – The head strap is a great thing to shoot hands free
- Red Underwater Filter – This really adds pop to underwater photos since when shooting underwater as it will take a more accurate white balance underwater.
- GoPro Tripod Mount – I often have a GoPro doing a time lapse while I am shooting sunset and having it on a tripod lets me leave it to focus on photography.
Sony RX100 VII – Point and Shoot Camera
Sony RX100 VII – This is by far the best compact camera I have ever used. With its 1″ Sensor, the versatile 24-200mm F/2.8-4.5 lens, Superfast focusing, and the ability to shoot at 20 FPS, this camera could be the only one you need. I always have the Sony RX100 VII in my pocket so that I am ready for any situation. It even has a viewfinder and an articulating screen. If you are looking for a camera for every situation and want to go ultralight then this is the camera for you.
DJI Mavic Pro 2 – Camera Drone
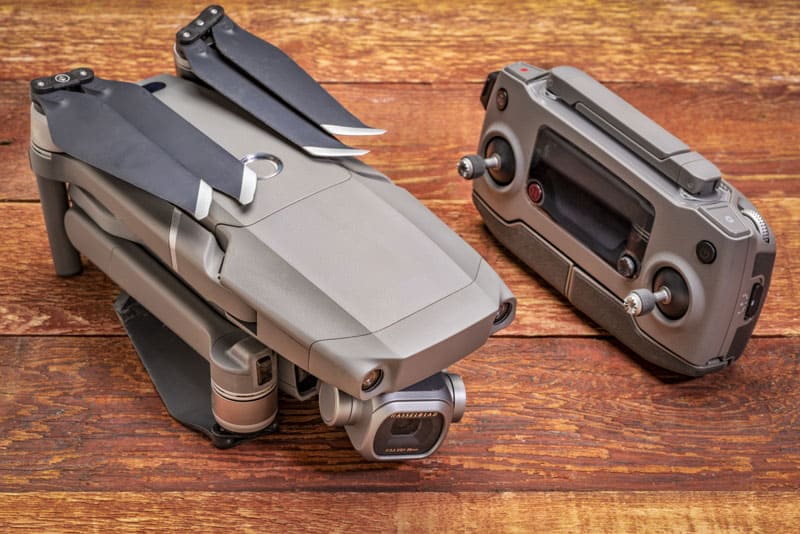
For travel photography I use the DJI Mavic Pro 2 because it is lightweight and perfect for traveling. Drones offer you a unique perspective that was unattainable until only a few years ago. We have used DJI drones since the first Phantom came out and love them. We switched to the Mavic Pro 2 as it has a great image and video quality, is really portable and the improved battery life has us using it more than ever. Add to that the intelligent flight modes, and the 360-degree sensors and it is the perfect package to capture any type of aerial shots that you can think of.
If you are thinking of getting this drone then we suggest also getting these Mavic Pro 2 Accessories:
- Sunshade for Mavic Pro 2 – A sunshade helps to see the screen when shooting in sunny and tropical destlinations.
- Car Charger – This has been a savior when on road trips. I fly my drone and then can recharge the batteries as I move on to my next destination.
- Extra Batteries – Drone batteries go quickly especially in cold weather, I carry two extra drone batteries on me when traveling.
- Extra Propellers – I have needed to change propellers while on a trip. Being a travel photographer means I need back up gear at my fingertips. Sometime I am in very remote regions and can’t just run to the camera shop.
My Camera Bags
Shimoda Explore 40 – Adventure Camera Backpack
I have gone through many different camera bags over the years to find one that the Shimoda Explore 40 comfortable, well organized and can hold all of my camera gear. That search has come to an end with the Shimoda Explore 40. This backpack checks all of those boxes for me.
In addition to that, it is durable, comes with a rain cover, utilizes a rear entry (so I don’t have to worry about thieves), it uses a modular insert system that allows me to customize the inside of the bag and take things in and out with ease and it is carry-on friendly.
Peak Design Everyday Messenger V2 – Small Camera Bag
This is the camera bag I use for quick trips where I know I will not need a lot of my camera gear. I also use it if I am going on a video shoot. Deb uses this Peak Design Everyday Messenger V2 camera bag all the time.
My Camera Tripods
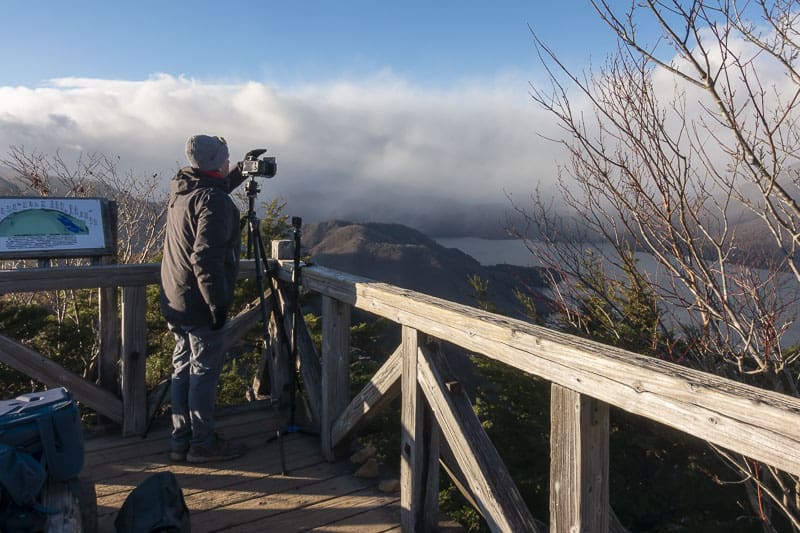
Gitzo GT2532 Mountaineer Series 2 Carbon Fiber– Travel Tripod
Tripods have always been a really personal choice and I have learned the hard way that a cheap flimsy tripod can really destroy your photos. After 10 years of searching, I think I have found what I was looking for in the Gitzo Mountaineer Tripod. It is made of carbon fiber, so it is light, it has 3 sections per leg so it is sturdy and it is made by one of the most reputable companies in the business. Check it out: Gitzo GT2532 Mountaineer Series 2 Carbon Fiber– Travel Tripod
The downside, they are not cheap. But I look at it as a long-term investment. This is the only tripod I will ever need. Paired with the Manfrotto 057 Ball head with Q5 Quick Release, this is the perfect combination for me.
Read more about why a good tripod is essential travel photography gear!
Joby Gorilla Pod 3K – Small Tripod
If we are heading into the back-country or somewhere remote for a longer period of time and I don’t want to carry the Gitzo tripod I will opt for the Joby Gorillapod. It is sturdy, versatile, weighs next to nothing and it comes with its own ball head. It also makes a great hand holder for the Go Pro or our phones when we are shooting vlog-style videos.
Camera Filters for Travel
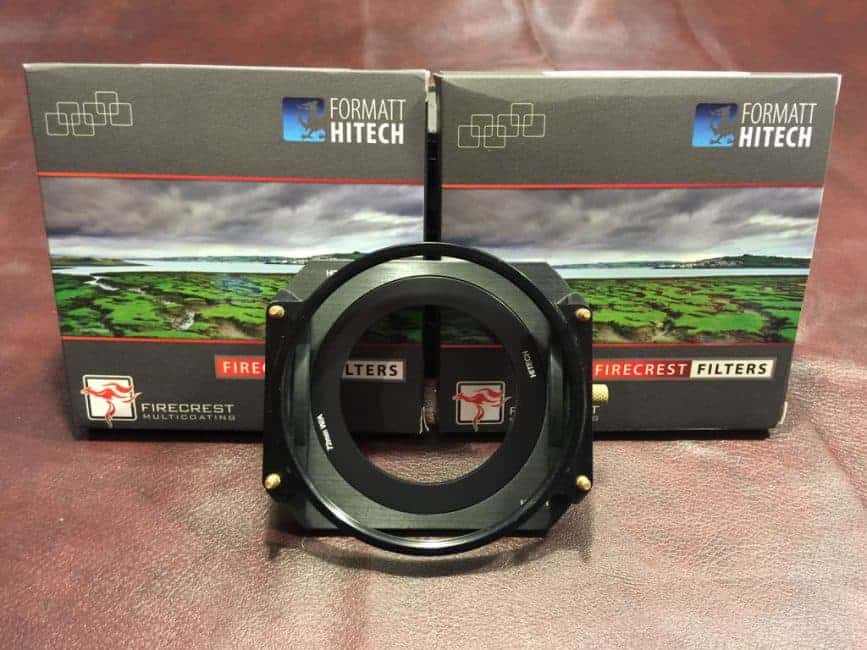
Formatt-Hitech Filter System – ND and GND Filters
When I started getting serious about my landscape photography, one of the first accessories I wanted to add to my kit was a set of ND filters that would allow me to get the best image in-camera that I could. This is always something I have been striving for. The more I can achieve in camera the less time I have to spend on post-production.
My current Formatt-Hitech filters allow me to accomplish this. I would recommend starting out with this filter kit and then adding what you would use most.
Read “How to Improve Your Photography with Filters” Now!
Camera Accessories
Black Rapid Sport Breathe – Camera Strap
I have been using this for years now. The Black Rapid Strap has become an essential piece of travel gear that I take with me everywhere. It is perfectly designed. The shoulder is padded, it comes with an underarm strap for more comfort and stability, and uses a locking carabiner quick-release. This is definitely the most versatile, comfortable camera strap I have ever owned.
Vello Shutter Boss II – Intervalometer/Remote
This is great for shooting time-lapses, star trails, and long exposures. It allows you to take photos on your tripod and eliminates camera shake. They make them for all different types of cameras. What I love about the Vello Shutter Boss II is that it is easy to operate, has an on/off switch to save batteries, and is affordable.
Spare Batteries
I always make sure to have at least 2 spare batteries for every camera that I carry with me. The last thing I want to do is miss out on a shot because my battery dies. This includes the GoPro, the A7RIII, A7RII, RX100VI, and the Mavic Pro 2 Drone.
Memory Cards
I have used Sandisk Extreme Pro memory cards from the beginning and have found them durable and reliable. Since moving to the Sony system I have switched to using a mixture of Sandisk Extreme Pro 64GB and Sandisk Extreme Pro 128GB capacity cards.
Shooting RAW files at 42 mega-pixel can really take up a lot of room. With the 2 card slots on the A7R III I can put one card in each slot and never worry about running out of memory. These cards read/write at fast speeds of 300/mbs so even when photographing fast-moving wildlife they can keep up with almost no buffering.
Card Reader
I usually use the card reader in my MacBook Pro, but since the new generation came out without a memory card reader I now carry the SanDisk Extreme PRO SD UHS-II USB-C Reader. It is extremely fast, doesn’t block any other ports on my computer, and is really reliable.
Portable Hard Drive
Backing up my photos while on the road is really important. I download all my photos to my Macbook Pro 15″ and back them up to the Samsung X5 Portable SSD. This is super small, really fast, and incredibly reliable. Exactly what I am looking for in a portable hard drive. After I return home they are uploaded to my home storage which consists of a multiple hard drive Raid system and a NAS system.
Camera/Lens Rain Covers
You want to protect your equipment from the elements and the OP/Tech USA Rain Sleeves are perfect for that. They are adjustable to any camera/lens combination, they are light and easily fit down the front zipper of my camera bag. I like them better than one designed for a certain camera model as I can use them on all the cameras that I carry. They have really come in handy when I was shooting in extreme environments like Antarctica and Iceland.
Camera and Lens Maintenence
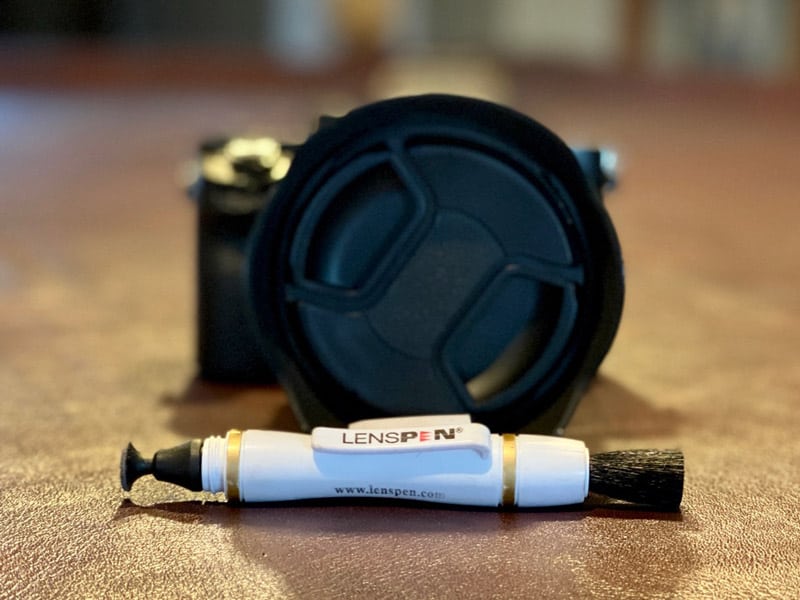
LensPen Cleaning Tool
This innovative design has been a favorite of mine for years. Shaped like a pen it thas a lens cleaner on one end and a brush on the other. It cleans lenses better than Microfibre cloths and it is easier to keep clean as well. I use this to clean all my lenses and filters.
Air Blower
I use this to keep dust off the sensor of my camera. When you change lenses often then you are bound to get dust specs on the camera sensor. I try to limit that by carrying 2 bodies but I do use this Air Blower every time I change a lens. You don’t want to be dealing with sensor dust in your photos and video if you don’t have to.
Camera Kit Suggestions
For most people, carrying all this gear would not be practical unless you are a working professional photographer like I am. Most people fall into 2 categories; the bare-bones minimalist, who wants to get good shots with the least amount of gear or the travel photography enthusiast, who wants great quality at a reasonable price.
Here are my camera kit selections for each one.
The Bare Bones Camera Kit for Tavel Photographers
- Sony RX100 VII – A light and durable compact camera
- Joby Gorillapod – A small lightweight tripod
- 64GB Sandisk Memory Card
The Enthusiast Camera Kit for Travel Photographers
- Sony a6100 – Interchangeable lens mirrorless camera
- Sony 18-200mm F/3.5-6.3 lens: Coverswide angle and telephoto at a good price.
- Peak Design Travel Tripod – Sturdy lightweight travel tripod
- BlackRapid Cross Shot Breathe – Camera Strap
- 64GB Sandisk Extreme Pro – Memory Cards
- Peak Design Messenger Pro V2 – Camera Bag
After 10 years of being a professional photographer, my camera gear has undergone many changes and continues to do so to this day. My recommendation would be to use this travel photography gear guide as a starting point to begin building your own kit that will last you for years to come.
You May Also Like
- 10 Landscape Photography Tips You Can Implement Today
- 6 Tips to Make the Most of Your New York City Photography
- The Ultimate San Francisco Photography Guide
- Antarctica Photography – 8 Easy Tips and Tricks
- A Photography Guide to Santorini – Getting that Postcard Shot
- Photography Tips from the Best Travel Photographers in the World
Disclosure: There are some affiliate links in the post above, but these are all products we highly recommend. We won’t put anything on this page that we haven’t verified and/or personally used.
If you enjoyed this travel photography guide, save it to Pinterest for future reference.
Check out these other Travel Gear Guides
Thank you so much for sharing with us the Photography Guide. It also gives us more experience. So everyone will be very helpful.
I love this post. At the point when you post about photography gear, it generally gets me energized. At the present time, I have a GoPro 6, Olympus em 10 Mark ii, in addition to an Olympus TG5. I am always trying to find out more and become a superior picture taker. Much obliged to you for continuing to impure with tips and information about your gear.
Thank you for the post. It saves my days!
This post is so amazing for me, everybody wants these type of camera for taking every picture or photo of their best moment of life. I love sony camera, it is really so much fantastic and excellent for quaility.
This post is so amazing, everybody wants these type of camera for taking every picture of their best moment of life. I love sony camera, it is really awesome…
Thank you for sharing a detailed guide about travel photography. I love to travel with my family to see natural beauty. I have a Sony Alpha A6400 Mirrorless Digital Camera for photography. I am not a professional photographer but try to shoot properly. Your guide will inspire me a lot. Thanks again for such a great guide.
I love this post. At the point when you post about photography gear, it generally gets me energized. At the present time, I have a GoPro 6, Olympus em 10 Mark ii, in addition to an Olympus TG5. I am always trying to find out more and become a superior picture taker. Much obliged to you for continuing to impure with tips and information about your gear.
Hey Dave and Deb, just been looking at your bio. Your traveling lifestyle makes me jealous wish I could give up work and travel maybe when I win the lottery. Interesting list of cameras and go pros that you use. You would really help beginners and pros out by rating your cameras on RateMyCamera.com giving us all more info and your thoughts behind each camera good and bad. Can’t stop looking through your insta feed.
I need a new wireless remote this looks great!
Good photography gear helps to store the best picture for the destination we come
I love your pictures! I’m also very much into landscape photography and in the process of buying my new gear. In the end, I decided to upgrade my old camera to a rather expensive Full frame DSLR, a 18-35mm f2.8 lens and planning on buying the 70-200mm f 2.8 zoom only one word… OUCH!!!)
I was so undecided when it came to choosing a mirrorless camera or a full frame one and for now I bought the latter and the ND graduated filters and a rather expensive polarized filter.
I totally agree with you on that one. You can’t go cheap if you want to see good results! I will test my slightly less expensive ND filters when I get my new gear (can’t wait! probably I’ll finally have it delivered by the beginning of next week ) and depending on the results I get, I will probably buy the filters you recommend. Your other guides on photography are awesome, thanks for sharing your tips, so useful!
I wish I had decided to buy a lighter body camera, but what’s done it’s done…in the meantime I’ll keep reading your posts and get inspired!
I have to, given the amount of money I invested on my photo gear, no matter how heavy they are, at least it’s a good way on not having any excuses to practice as much as I can 🙂 well done. I will bookmark this so I remember what kind of filters you’re using.
Great job you’ve done! I am addicted to your Instagram feed 🙂
How do you insure your equipment?
i shoot with a canon 7d and do portraits and studio work. when we jet off in January with the family i would like to bring some good glass with me. i also generally shoot with my iPhone for convenience. I’m thinking of selling my 35mm and 85mm primes as they are better suited for studio and outdoor portrait shots. that leaves me with a REALLY heavy 17-55 2.8 a 50mm an 18-55mm kit lens and a 70-300 kit lens.
suggestions??? i have two boys. they are young. we have a ton of crap to carry with us. I would like to leave the 17-55 behind and just bring the kit lens but I’m hesitant! would love some feedback!
You guys are an inspiration for me to keep on going with my own travels. Lately I’m thinking more and more of how many photos I don’t take because I’m lazy sometimes to scoop out or carry around my Canon 5d MKIII, maybe I just have to join the mirrorless club one of these day.
Reading The Planet D dynamic duo Dave & Deb is my favorite part of the day! Thank you guys for such tips and Dave the landscapes you’ve posed with is a treating distraction from your tips but I managed to get back to the lines!
Great, thorough guide! Thanks for sharing your tricks of the trade 🙂
This post is so amazing fof me, everybody wants these type of camera for taking every picture or photo of their best moment of life. I love sony camera, it is really so much fantastic and excellent for quaility.
Hey I also wanna this type of camera.
This post is so amazing, everybody wants these type of camera for taking every picture of their best moment of life. I love sony camera, it is really so much fantastic.
Thanks Dave & Deb, some great tips for photographer gear. I’m intrigued about using a wacom tablet for editing, and your suggestion will probably get me over the line 🙂
Also another tip for mobile photography is the LG G4. It shoots in RAW and has a new full manual mode. Worth checking out.
Hey guys! I’m a gadget and gear geek, and this is really interesting! I’ve got a Canon 70d with 3 lenses, and have often considered going to a mirrorless system, I’m scared of the video quality, and learning a new camera, but the thought of having less gear and weight is a dream!! I’ve also been looking for a decent compact that takes good video, and have looked at the Sony RX100 II before. If you get a sec, can you tell me what the photo quality is like at night? As that’s important for me as if I go out in the evening I usually just take a compact…
Really great post though as always, and this one is going in the favourites folder 🙂 Scott
You mention Formatt-Hitech filters and Firecrest filters, but have you ever used B+W filters?
I’m looking for some new ND filters and a lot of pros I know use these ones – I would love to know your thoughts on this!
Cheers,
Macca
Wowza!
So mine looks like this:
– GoPro Hero4 – which I’ve not used much lately
– Samsung Galaxy Note 4 – which I use all the time
– Two selfie sticks – which I’ve not used much lately (long story why I have two)
– Macbook Pro
– Portable Toshiba 2T hard drive – one of like 4 of these. I need to find a proper case for it though. It gets bashed around a bit.
– Screenflow – Used for video editing and screen capture for tutorial videos
My kit is small as I just have a backpack when I travel so no room for the extras. I used to have a Nikon D70S with up to a 300m lens, but I no longer carry that baby around.
Thanks for the insights.
Hi, Dave and Deb. I really love the whole Photography Guide you have shared. I enjoyed this post too much.
If anyone is there for getting the travel photography guidance, then this article really helps you a lot as it is completely stuffed with all kind of tips and tricks to make a great experience with the camera and makes us easier to access all the functions of the camera for a perfect shot.
I have the same opinion. This is really great guide. Thank you for sharing this.
Warm Regards
Martuja